How To Repair LED Bulbs
In order to save some money, you may need to know how to repair LED bulbs. It’s a dirty little secret of LED lamps. Something only spoken in hushed tones in the dark corners of the internet. LED bulbs do not last as long as advertised. When LED life is talked about they talk about life in years but if the conditions are right it can be a life of months.
Heat is the enemy
That dirty little secret is heat. LED bulbs are electronic in nature and heat is the enemy of all electronic components. LED bulbs are meant to be used in a candle type situation. By that, I mean that the light(the heat generating section) needs to be the highest point of the bulb while generating light to get the maximum bulb life. If the bulb is horizontal(laying on its side) or upside down while operating that’s strike one. If the LED bulb is enclosed this is also another bad condition. The heat the bulb generates can’t be dissipated easily shortening its life.
Bad positions
If your lamps are burning out in months instead of years the problem is heat. You may need to replace a LED bulb every few months if your bulb is operating horizontally, upside down and or enclosed. I have found that most of my light fixtures(ceiling types) have the bulbs installed horizontally or upside down and enclosed. A double hit to the bulb’s life.
Set the multimeter to ‘Continuity’ mode. It may vary among DMMs, but look for a diode symbol with propagation waves around it (like sound coming from a speaker). How to Use a Multimeter

Continuity test
In electronics, a continuity test is the checking of an electric circuit to see if current flows (that it is in fact a complete circuit). A continuity test is performed by placing a small voltage (wired in series with an LED or noise-producing component such as a piezoelectric speaker) across the chosen path. If electron flow is inhibited by broken conductors, damaged components, or excessive resistance, the circuit is “open”.
Devices that can be used to perform continuity tests include multimeters which measure current and specialized continuity testers which are cheaper, more basic devices, generally with a simple light bulb that lights up when current flows.
Back from the dead
Did you know that most LED bulbs can be brought back from the “dead”? Most of the time a single diode is the problem. If you can determine the bad diode through a continuity test then you can remove it and short circuit the connection(solder it) and the bulb will shine once again. I just followed the below procedure and it took longer to look for the tools and to heat up the soldering iron than it took to get the bulb working again.
Short Circuit
A short circuit is simply a low resistance connection between the two conductors supplying electrical power to any circuit.
But you’re going to need some tools to get the bulb back into action.
Tools and Materials needed:
- Soldering iron
- Electronic solder
- Powered device for testing diodes(Multimeter with continuity test)
- Pocket knife
- Something that will support the bulb while checking the LEDs.


What to do
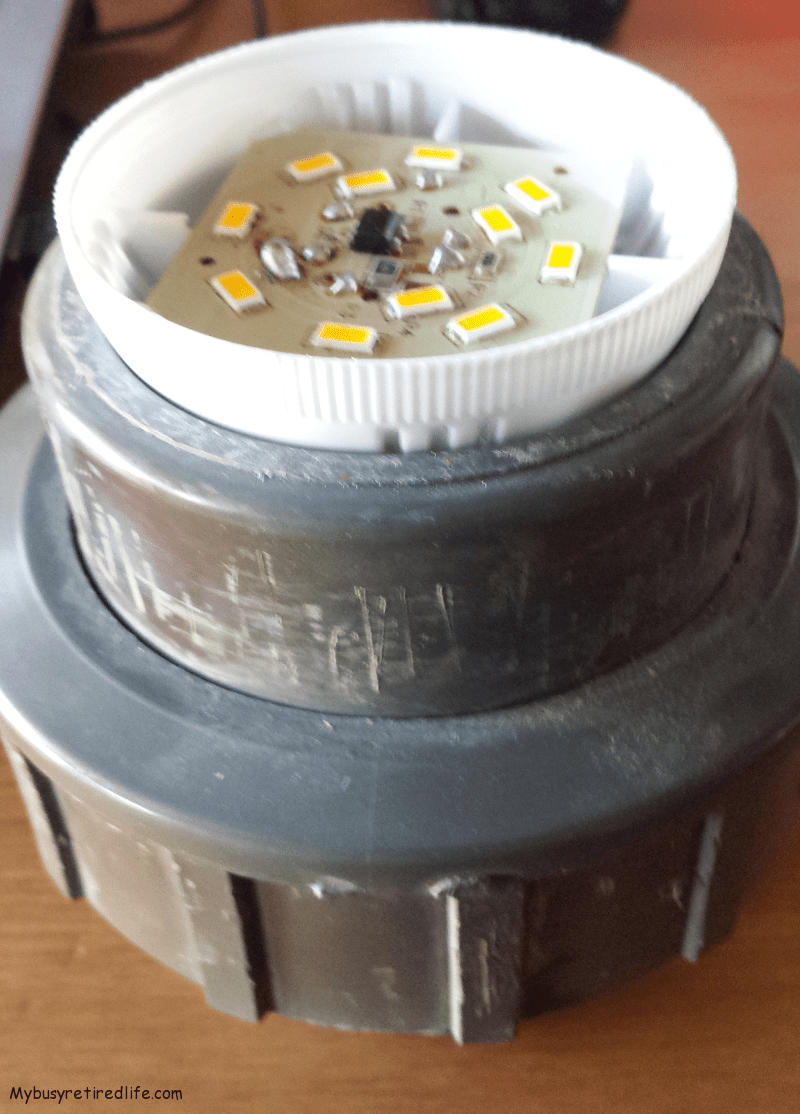
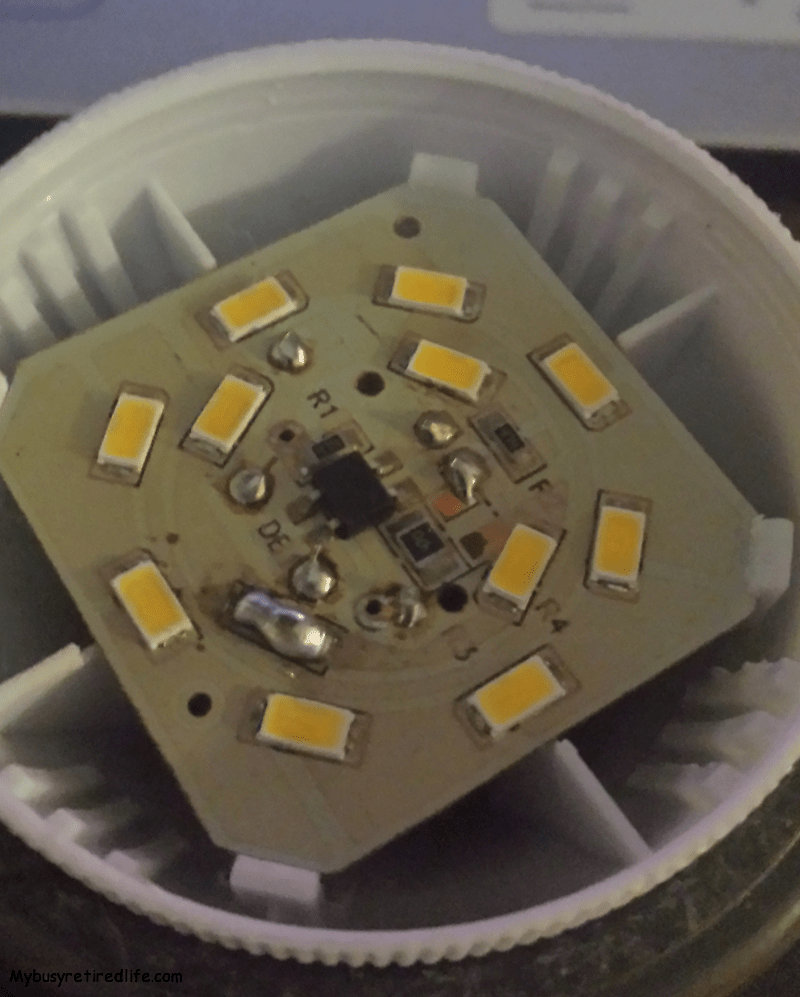
You will need to have the bulb secured while you search for the bad LED. I used an old PVC fitting that I had laying around. It was narrow enough to cradle the bulb and tall enough that the bulb base was suspended in the air. This combination of dimensions supports the bulb and allows you to find the bad LEDs and provides support while soldering. A short section of 2″ PVC pipe, a ceramic ceiling bulb holder are a couple of things that come to mind that will work.
Find the bad LED
- Set the multimeter to continuity setting.
- Take the probes from the multimeter and touch the contacts at each end of the LEDs. If the LED is good it will light up. If it’s bad no matter of contact will cause the LED to light up. Take your time, practice to get a handle on how and where to place the probes on the LED. You will eventually make contact and the LED will light up if it’s good.
- Repeat until you have tested each LED.
- Once you find a bad LED mark it.
- Gently pry up on the bad LED and remove as much of it as you can.
- Solder the contacts together(see video below).
- Check your work.
- Congratulations, you’ve learned how to repair LED bulbs.
How to solder
What you need
- 25-watt soldering iron
- 60-40 Tin Lead Rosin Core Solder Wire for Electrical Soldering
- Solder Tip Cleaning Sponge
- Isopropyl Alcohol Liquid Cleaner
Conclusion
That’s it a few tools and a little time along with some vital information and you are on your way to repairing those “dead” LEDs.
Related Articles: More home repairs
(Mybusyretiredlife.com All Rights Reserved)
(Mybusyretiredlife.com All Rights Reserved)
(Mybusyretiredlife.com All Rights Reserved)
(Mybusyretiredlife.com All Rights Reserved)
(Mybusyretiredlife.com All Rights Reserved)
Liked This Post? You May Like These:

from what i understand on the circuit and cause of failure in these kinds of bulbs just soldering the pads where the failed led was in bulbs that are many led in series will change the forward voltage to turn them on to a lower value and that would result in the current limiting being done to prevent the leds from instantly burning out being greater then what is within the tolerances of those leds and they would probably be brighter and hotter for a bit just fixing it without replacing the failed led and lead to a quick failure of another led in the bulb.. it would be only increase of power driven into each led that is the fraction of the total number of led in series value of the one missing but that could push things just pass tolerance they can reliably work on..
Hello Logan,
Ok, first thing is to thank you for the comment. Comments always tell me that someone has read the article and it created enough curiosity to rate a question or comment.
My thoughts on this subject are that if someone is reading this article, they(like me) have had enough of a problem with LEDs prematurely burning out that they don’t want to see more of their money going into the trash can. I consider this to be the goal. My own experience with this problem is that the bulb when “fixed” was a little less dim than the other bulbs. As of this comment, it has been running every day for the past sixteen months(since I fixed it) without fail. I consider this a win. This has stretched my dollars invested in the bulb from two months to eighteen months and counting and given me more value. If that poor little current limiting resistor has to work a little more that’s ok with me.
Again thanks for the comment,
RayC