Expandable Hose Repair
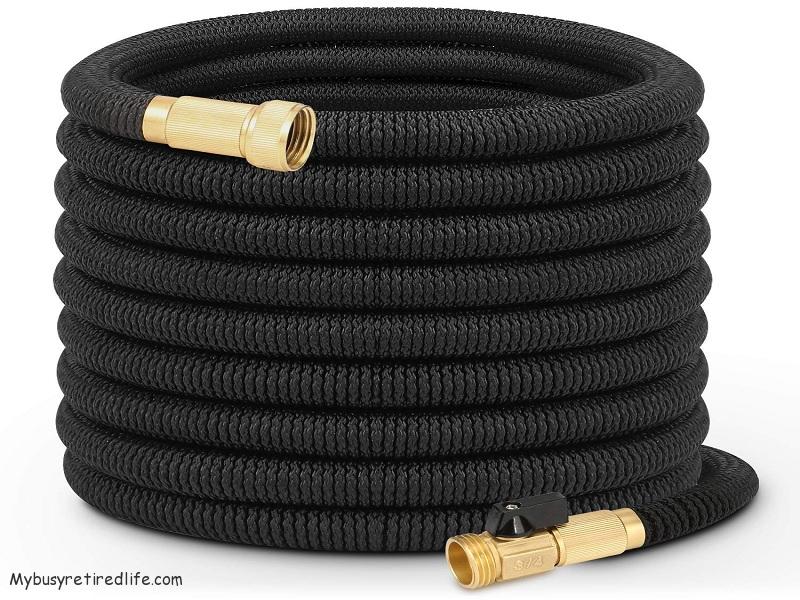 Expandable Hose
I needed an expandable hose repair recently. You know the kind it starts out a foot long. You add water pressure and grows out to fifty feet long. Now that may be an exaggeration but now you know which water hose I’m talking about. It seems that this type of hose is special and none of the usual water hose repair parts will work on it. This is due to the expandable nature of this hose. The inner tube of the hose is more like a surgical tube than a normal water hose so any repair parts need to favor the surgical tube feature for a good repair.
Things to watch for during the repair
There are things that you will need to watch for during the repair of an expandable hose. The hose consists of two parts. The inner expanding tube and the covering that is supposed to protect that tubing. Because the tubing is extremely soft and expandable if you cut it without holding onto the tube it will very likely slingshot back into the tubing’s cover and then you will need to fish it out from inside the cover. Also if you’re doing a repair at the connector area you will need to disassemble the end by unscrewing the parts then hold the tubing while you again cut the tubing and cover.
First, the leak will either be at the hose end or somewhere in the middle of the hose. Where the leak is will determine how you handle the repair. So let’s deal with the two conditions that can occur.
Executing a repair in the middle of the hose
- Have your hose connected toa spigot and turn on the water to expose the leak. You’re going to need a set of locking pliers(2) and a sharp knife or scissors.
Don’t create new holes
Use a piece of cardboard folded to protect the hose from the locking pliers’ jaws - Find the leak and lock the locking pliers onto the hose(not to tight you don’t want to create new holes) a few inches from the leak on each side.
- Turn off the water and wait until the hose is back to its unexpanded length.
- Check that the pliers have a good hold on the hose covering and tubing.
- Cut the hose(covering and tubing) as close to the leak as possible.
- Pull back the covering and do a close inspection of the tubing for very small puncture/holes. These holes will be very small due to the extremely flexible material of the tubing. Best practice would be to remove at least several inches of the tubing from each side of the hole’s location.
- For a repair in the middle of the hose use a 1/2″ barbed coupling. Lubricate the coupling with some soapy water to help with the installation of the tubing over the coupling.
- Cut a small piece of the tube from the material you removed. This piece will slide over the inner tube to provide additional protection for the inner tube from the clamp.
- Slide the small piece over the inner tube.
- Slide the inner tube over the barbed connector(see photo below) then slide the small piece over the barb connector.
- Best practice for this type of hose is to use a wire clamp for the smallest profile. See related article for several versions of a wire clamp forming tool.
- With the tubing firmly over the barbed coupling pull the outer cover over the tubing and apply a wire clamp over the outer cover to secure both parts of the hose.
- Repeat steps 7- 12 for the other end of the hose.


To repair a leak at the hose end
- Have your hose connected to a spigot and turn on the water to expose the leak. You’re going to need locking pliers and a sharp knife or scissors. You will also need something(I used a file) to cut a metal ferrule crimped onto the hose end.
- Unscrew the hose end fitting and collar and slide the collar down the hose a good distance.
- Fold some cardboard over the tubing several inches below the leak and clamp the locking pliers onto the hose.
- Cut the crimp holding the tubing in place from the hose end fitting. I used a file on the ferrule on a high point until the file went through.
- Cut the tubing several inches from the leak.
- Lubricate the hose end fitting with soapy water to aid with the installation.
- Slide the tubing over the barbed end of the hose end fitting. If your hose has an additional piece of hose over the part that gets clamped(like mine did) put it on the tubing before you place the tubing over the threaded barbed fitting then slide the extra piece over the tube. This extra piece will help prevent accidental cutting of the tube when clamped.
- Slide the cover over the tubing and secure both pieces to the fitting with a wire clamp. This type of clamp is so low profile that it will allow the original threaded fitting part and the matching threaded collar to be reinstalled easily. Your repair will look just like the original factory hose connection.
 Wire clamp on tight need to push down the ends and slide the threaded brass piece to cover the clamp.
The wire clamp
The wire clamp provided the lowest profile for the repair at the hose end. It allowed the fitting to be returned to near factory installation. Also if chosen for a middle of the hose repair it provides the smallest repair profile.
(Mybusyretiredlife.com All Rights Reserved)
(Mybusyretiredlife.com All Rights Reserved)
(Mybusyretiredlife.com All Rights Reserved)
(Mybusyretiredlife.com All Rights Reserved)
(Mybusyretiredlife.com All Rights Reserved)
(Mybusyretiredlife.com All Rights Reserved)
(Mybusyretiredlife.com All Rights Reserved)
(Mybusyretiredlife.com All Rights Reserved)
Liked This Post? You May Like These:

Thanks so much for this! All the other pages I found seem to have a simpler plastic end on the hose so I was happy to see in your instructions the same hose with metal crimping on the end. It was a bitch to get off but once I got it off the repair was easy and just used a crimp clamp to reattach even though the plastic bit wouldn’t screw back over top but that seems just cosmetic anyway.
Hello Doug,
First, thank you for the comment. It is always nice to hear that one of my articles has helped someone. I’m glad the repair was successful for you. Anyway thanks again and I am glad that it worked for you.
RayC.
I find your instructions on how to repair a leak in the middle of an expandable hose very interesting but for me it would be very labor-intensive & would have to buy some tools to do it. Guess duct tape won’t work right 🤗
Hello Pam,
First thing, thank you for the comment. Yes, you are right at 13 steps it is rather long. But when I put this together I used a hypothetical situation where you are alone and the steps give you the best chance for success with little or no problems while executing the procedure.
Yes, you would need some tools a pair of locking pliers and a pair of scissors. If you don’t want to have the rubber tubing slingshot back into the outer covering you are going to need the pliers. But if your careful and have good hand strength you can cut the tubing while tightly holding the hose. I don’t recommend tying a knot in the hose as this tubing material is pretty susceptible to holes from rough handling.
Without using pliers you have a three-handed job on your hands. One hand holding the two ends while the other two hands peel back the outer covering and hold the tube. Maybe a friend could help out. If you don’t want to use a wire clamp you can always use a standard hose clamp. Though my personal preference finds the hose clamps to be pretty clunky fix. I also find that the hose clamps can easily snag on anything it is dragged across. But again that is my personal preference.
Again thank you for the comment and good luck in your repair endeavors.
RayC
Thank you for sharing your experience. For this third generation expandable hoses is the only one worth the trouble to fix. Was wondering if 1 or 2 small zip ties may work if the female end of the zip tie was small enough profile.? That I what I have and will try.I will let you know.
Hello Shawna,
First thing, thank you for the comment. The successful use of zip ties would depend on a few things. In no particular order, time, temperature, and pressure. The last one is where the repair is located on the hose.
How much pressure is your water system delivering? If your system pressure is on the low side that would be a good thing. How many minutes do you use the hose? Is it used to water an entire lawn or a few potted plants? Is the hose left with water pressure on the repair or do you relieve the pressure every time it is used and stored? The last one is where is the hose repair located? Is it in the middle of the hose where there would be nothing to support the zip ties from stretching or under the end fitting?
Don’t get me wrong. I think the use of zip ties is very interesting. But, when I do a repair I do not want to come back for a second try. So I try for the best chance for a lasting repair. If the manufacturer determined that they needed a metal ring over a plastic one(they don’t want to spend any more than needed) to retain the hose’s tube then you can bet that is what you’ll need. Good luck in your endeavors. I’d like to hear about those zip ties.
RayC
I am looking how to replace the brass connector on a Peotouvy expandable hose where you would connect the nozzle, not the faucet end. What part do I need to purchase to make this repair. Thanks.
Hello Delores,
The part you are looking for is called a male end. While I haven’t worked on that particular brand of hose the repair would still be the same for any brand of expandable hose. Remove the damaged end. Determine if you can salvage the damaged end or go with all new parts. I noticed that this hose uses brass ends. So if you want to replace the end with a brass end you’re going to have do some detective work and determine the size of the tube being used by that hose. It’s easy, just measure the old part that the hose/tubing slips onto. My bet is that it will be close in size to a half-inch barbed connector. If so these would be the parts you need. If plastic ends are ok to use as replacements these would be the parts you need.
Good luck on your endeavors,
RayC
So glad to find your repair instructions. Thank you. I have repaired the plastic end hoses before with the kits you can buy, but I could not find anything for these brass end hoses. My question, did you make the wire clamp, or buy it.? If you made it, what gauge of wire did you use? Thanks.
Hello Beverly,
The wire clamp can be made up using different gauges of wire. But all the wire is a “safety wire” type. The average is .041″ in diameter your choice. The smaller the easier it is to work with. The larger diameter is harder to work with but is more durable against high pressures. If it was my choice I’d go with the smaller diameter wire. Go to the article that shows how to make the tool for making up the clamp. If the link doesn’t work do a search for “wire clamp tool” on this website. The article shows you how to make the tool in three different ways.
Good luck with your endeavors.
RayC