Used Electric Rototiller Setup
A used electric rototiller setup can be essential to its longevity. I recently decided to purchase a used electric rototiller. With this purchase came the missing knowledge of its maintenance. You just don’t know the condition of a used piece of equipment. Oh yes, you can get a lot of information before the purchase just by using your eyes and ears. But after that, you just don’t know where that piece of equipment really is on its way to its eventual failure.
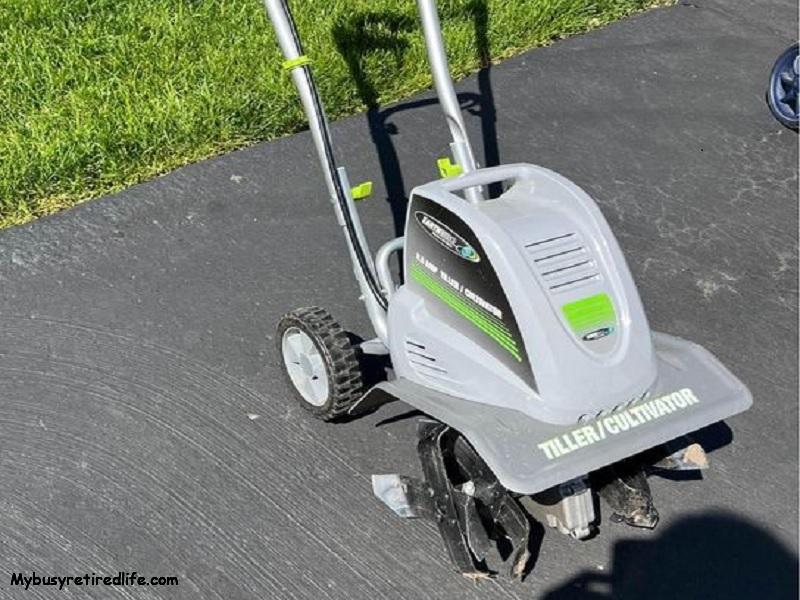
Electric rototiller used
So this article is what I consider to be essential to get a detailed picture of your new-to-you rototiller’s mechanical condition. There are three major parts to the tiller, the motor, the gearbox, and the tines. These are the parts that make up your tiller. If any one of these has a breakdown the tiller is no longer viable. So let’s start with the premise that when you purchased your used tiller you made the old owner pull the trigger and turn it on. So when you finally get it home you already know that the motor works, that the gearbox delivers the power to the tines, and that they spin.
Used Electric Rototiller Setup, The Motor
The motor will fail if it does not have adequate cooling. So air must be free to move through the motor windings for cooling. So inspect all vent openings for blockages. Clear any debris that is in those openings and follow up with a good blow-down of each vent. You can use the following to achieve this task. If you have a shop vac use it to suck/clear any buildup at the vents. Then place the hose on the discharge port of the shopvac and use the hose to blow air through the vents. If you have an air compressor, use a blowgun to blow air into each vent. No shop vac or compressor, how about canned air? You can purchase a can of pressurized air and blow out each vent.
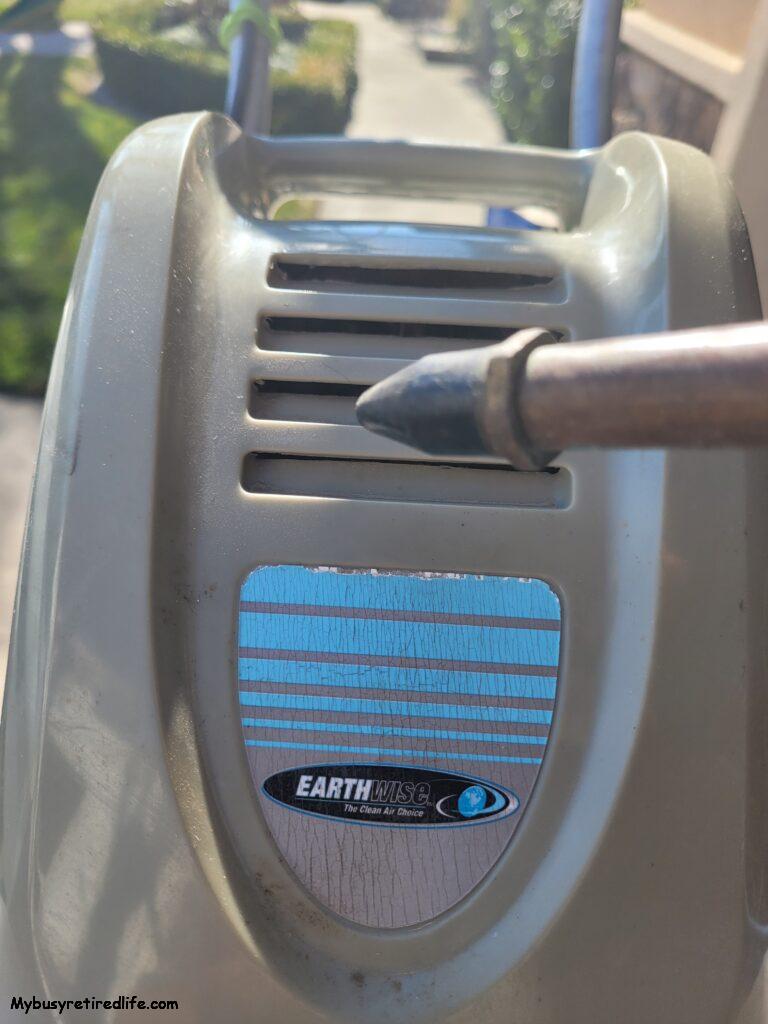
Blowgun used on all motor vents
Used Electric Rototiller Setup, The Gearbox
The gearbox on each brand of electric rototiller will be different but they all will be the same in that the failure of the gearbox is a lack of lubrication(lack of or no oil). The second failure point check involves the same oil, this check is whether the tiller is on its way to failure by checking the gearbox oil for metal particles. Being able to check the oil condition/level will require a port that can be opened up and a level of fluid maintained to protect the gearbox from failure.
Fail Points
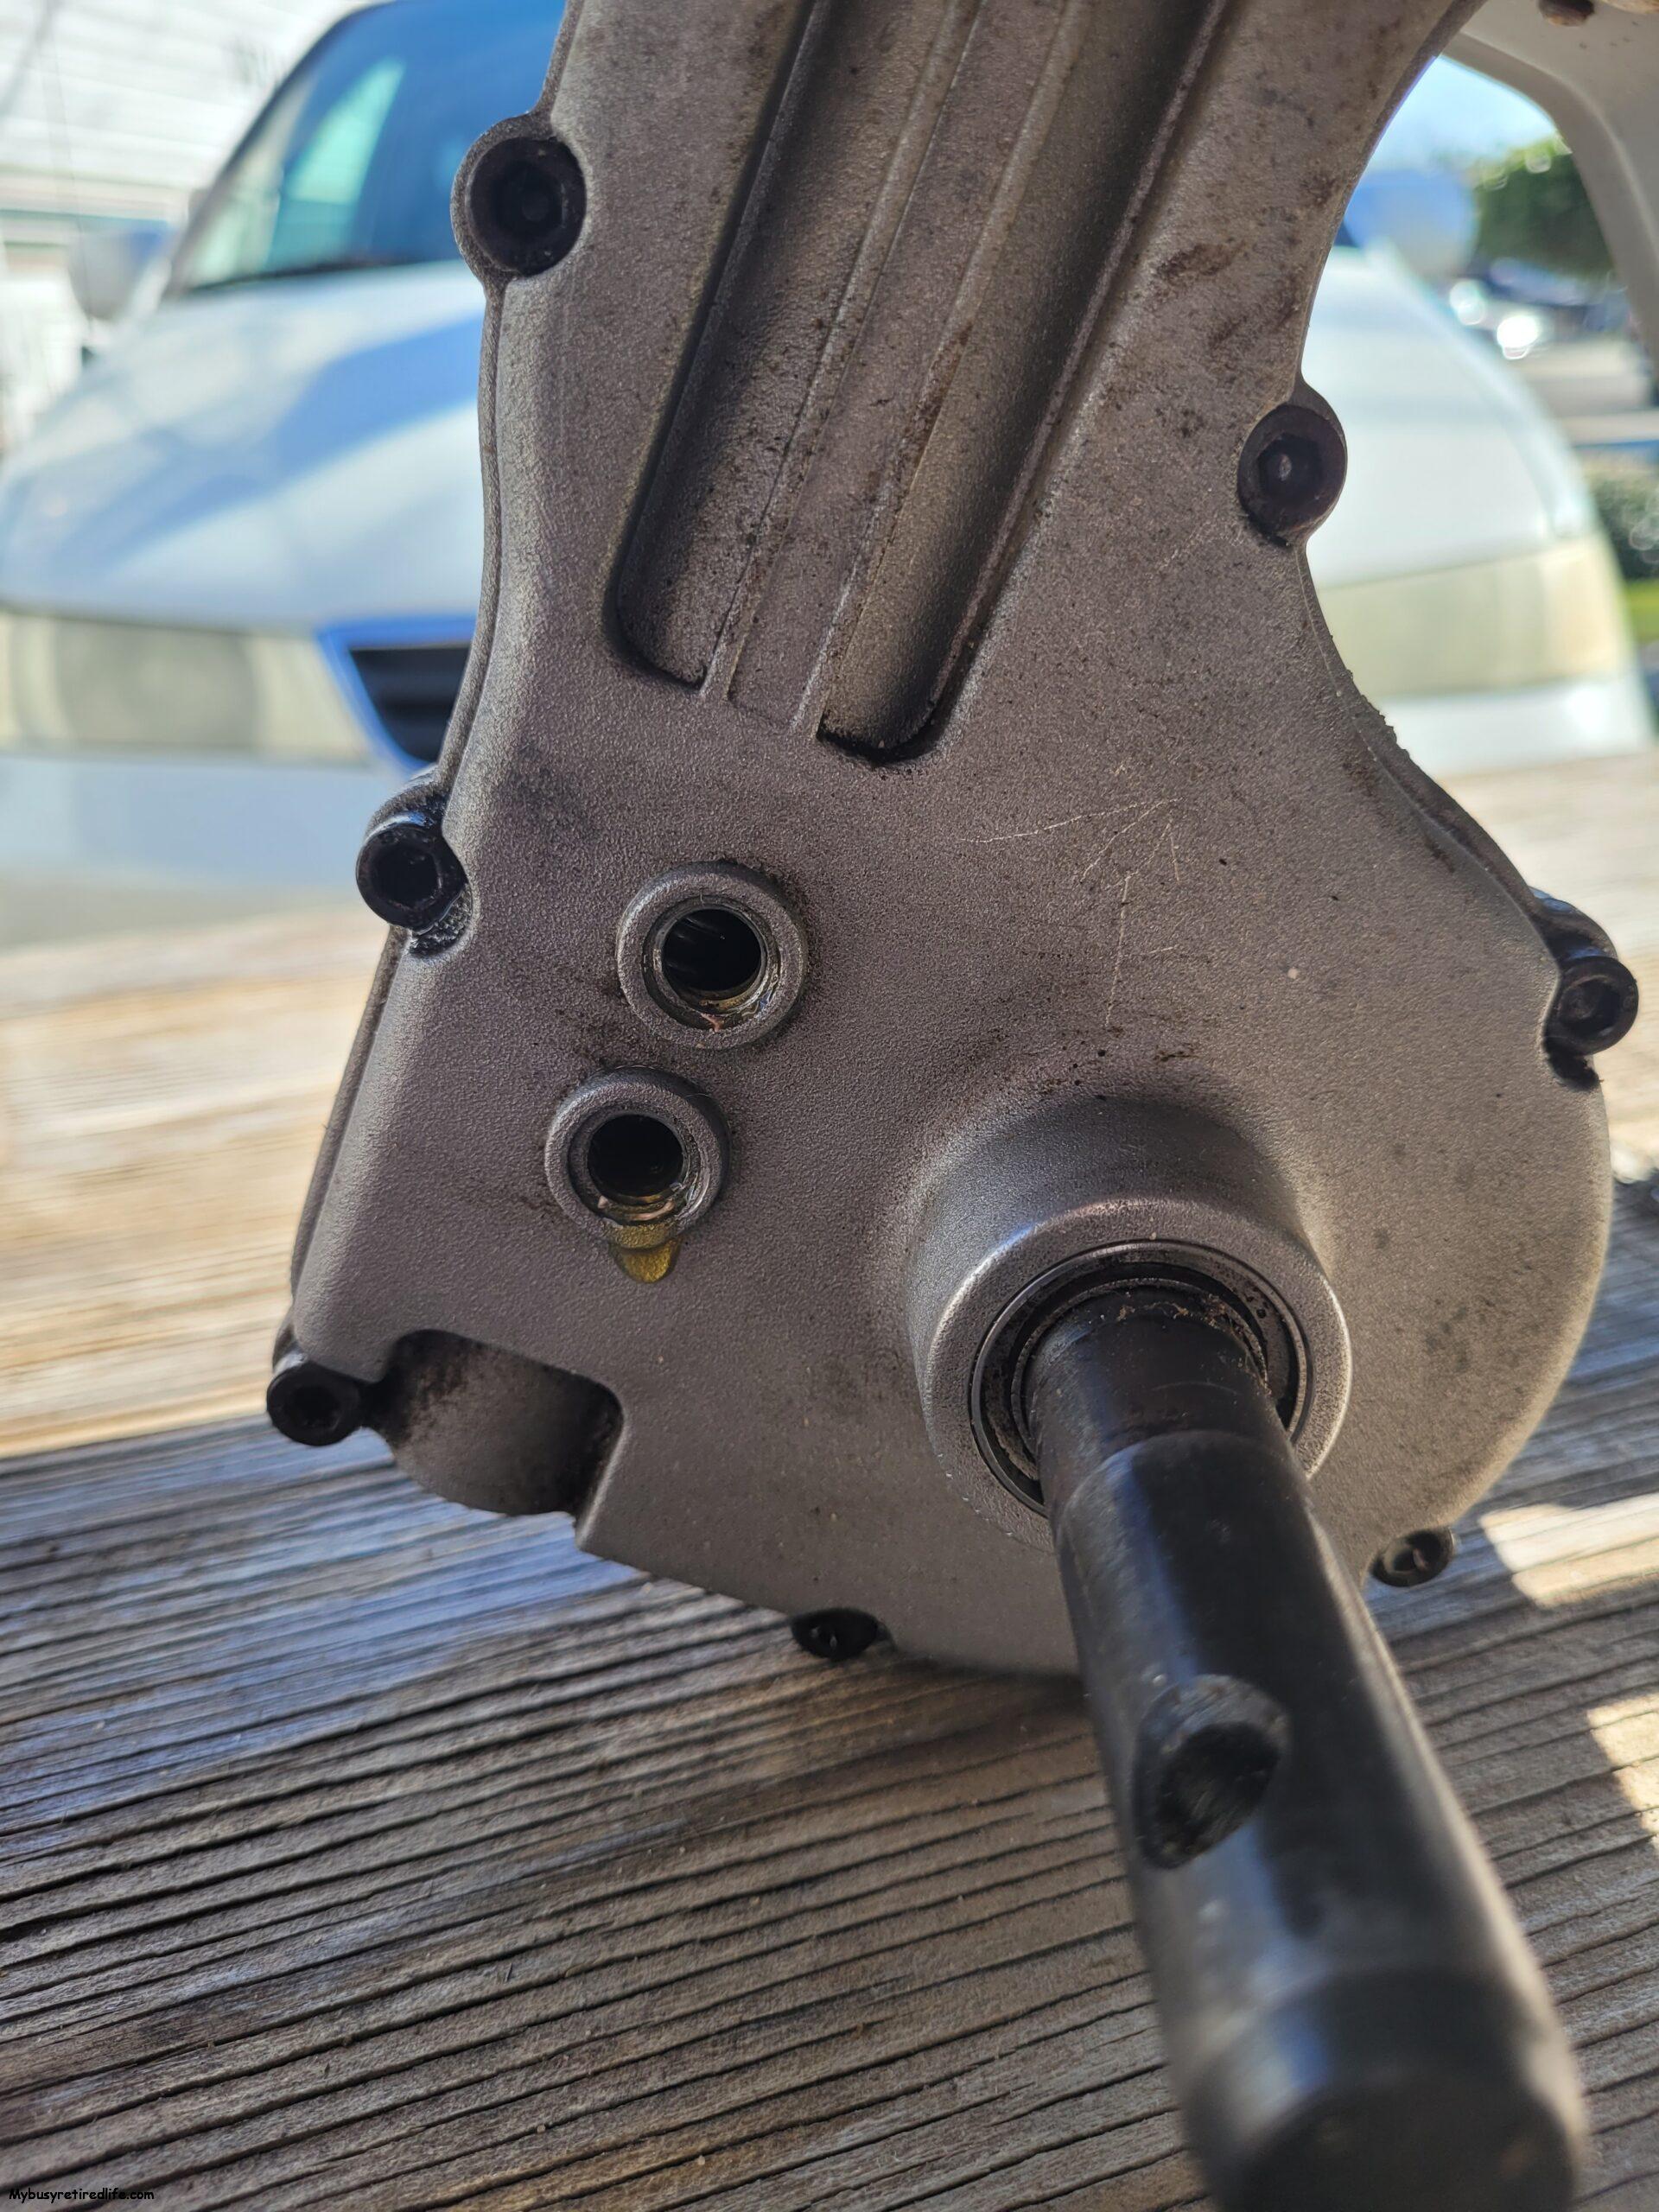
In my case, the gearbox is made up of two separate halves of the gearcase that are bolted together. The tine’s shaft protrudes through the gearbox from each half. The fail points for this design(oil leakage) are where the case bolts together and where the tine’s shaft comes through the case. There is a seal at each point where the shaft comes through the case.


Dealing with Oil Leaks
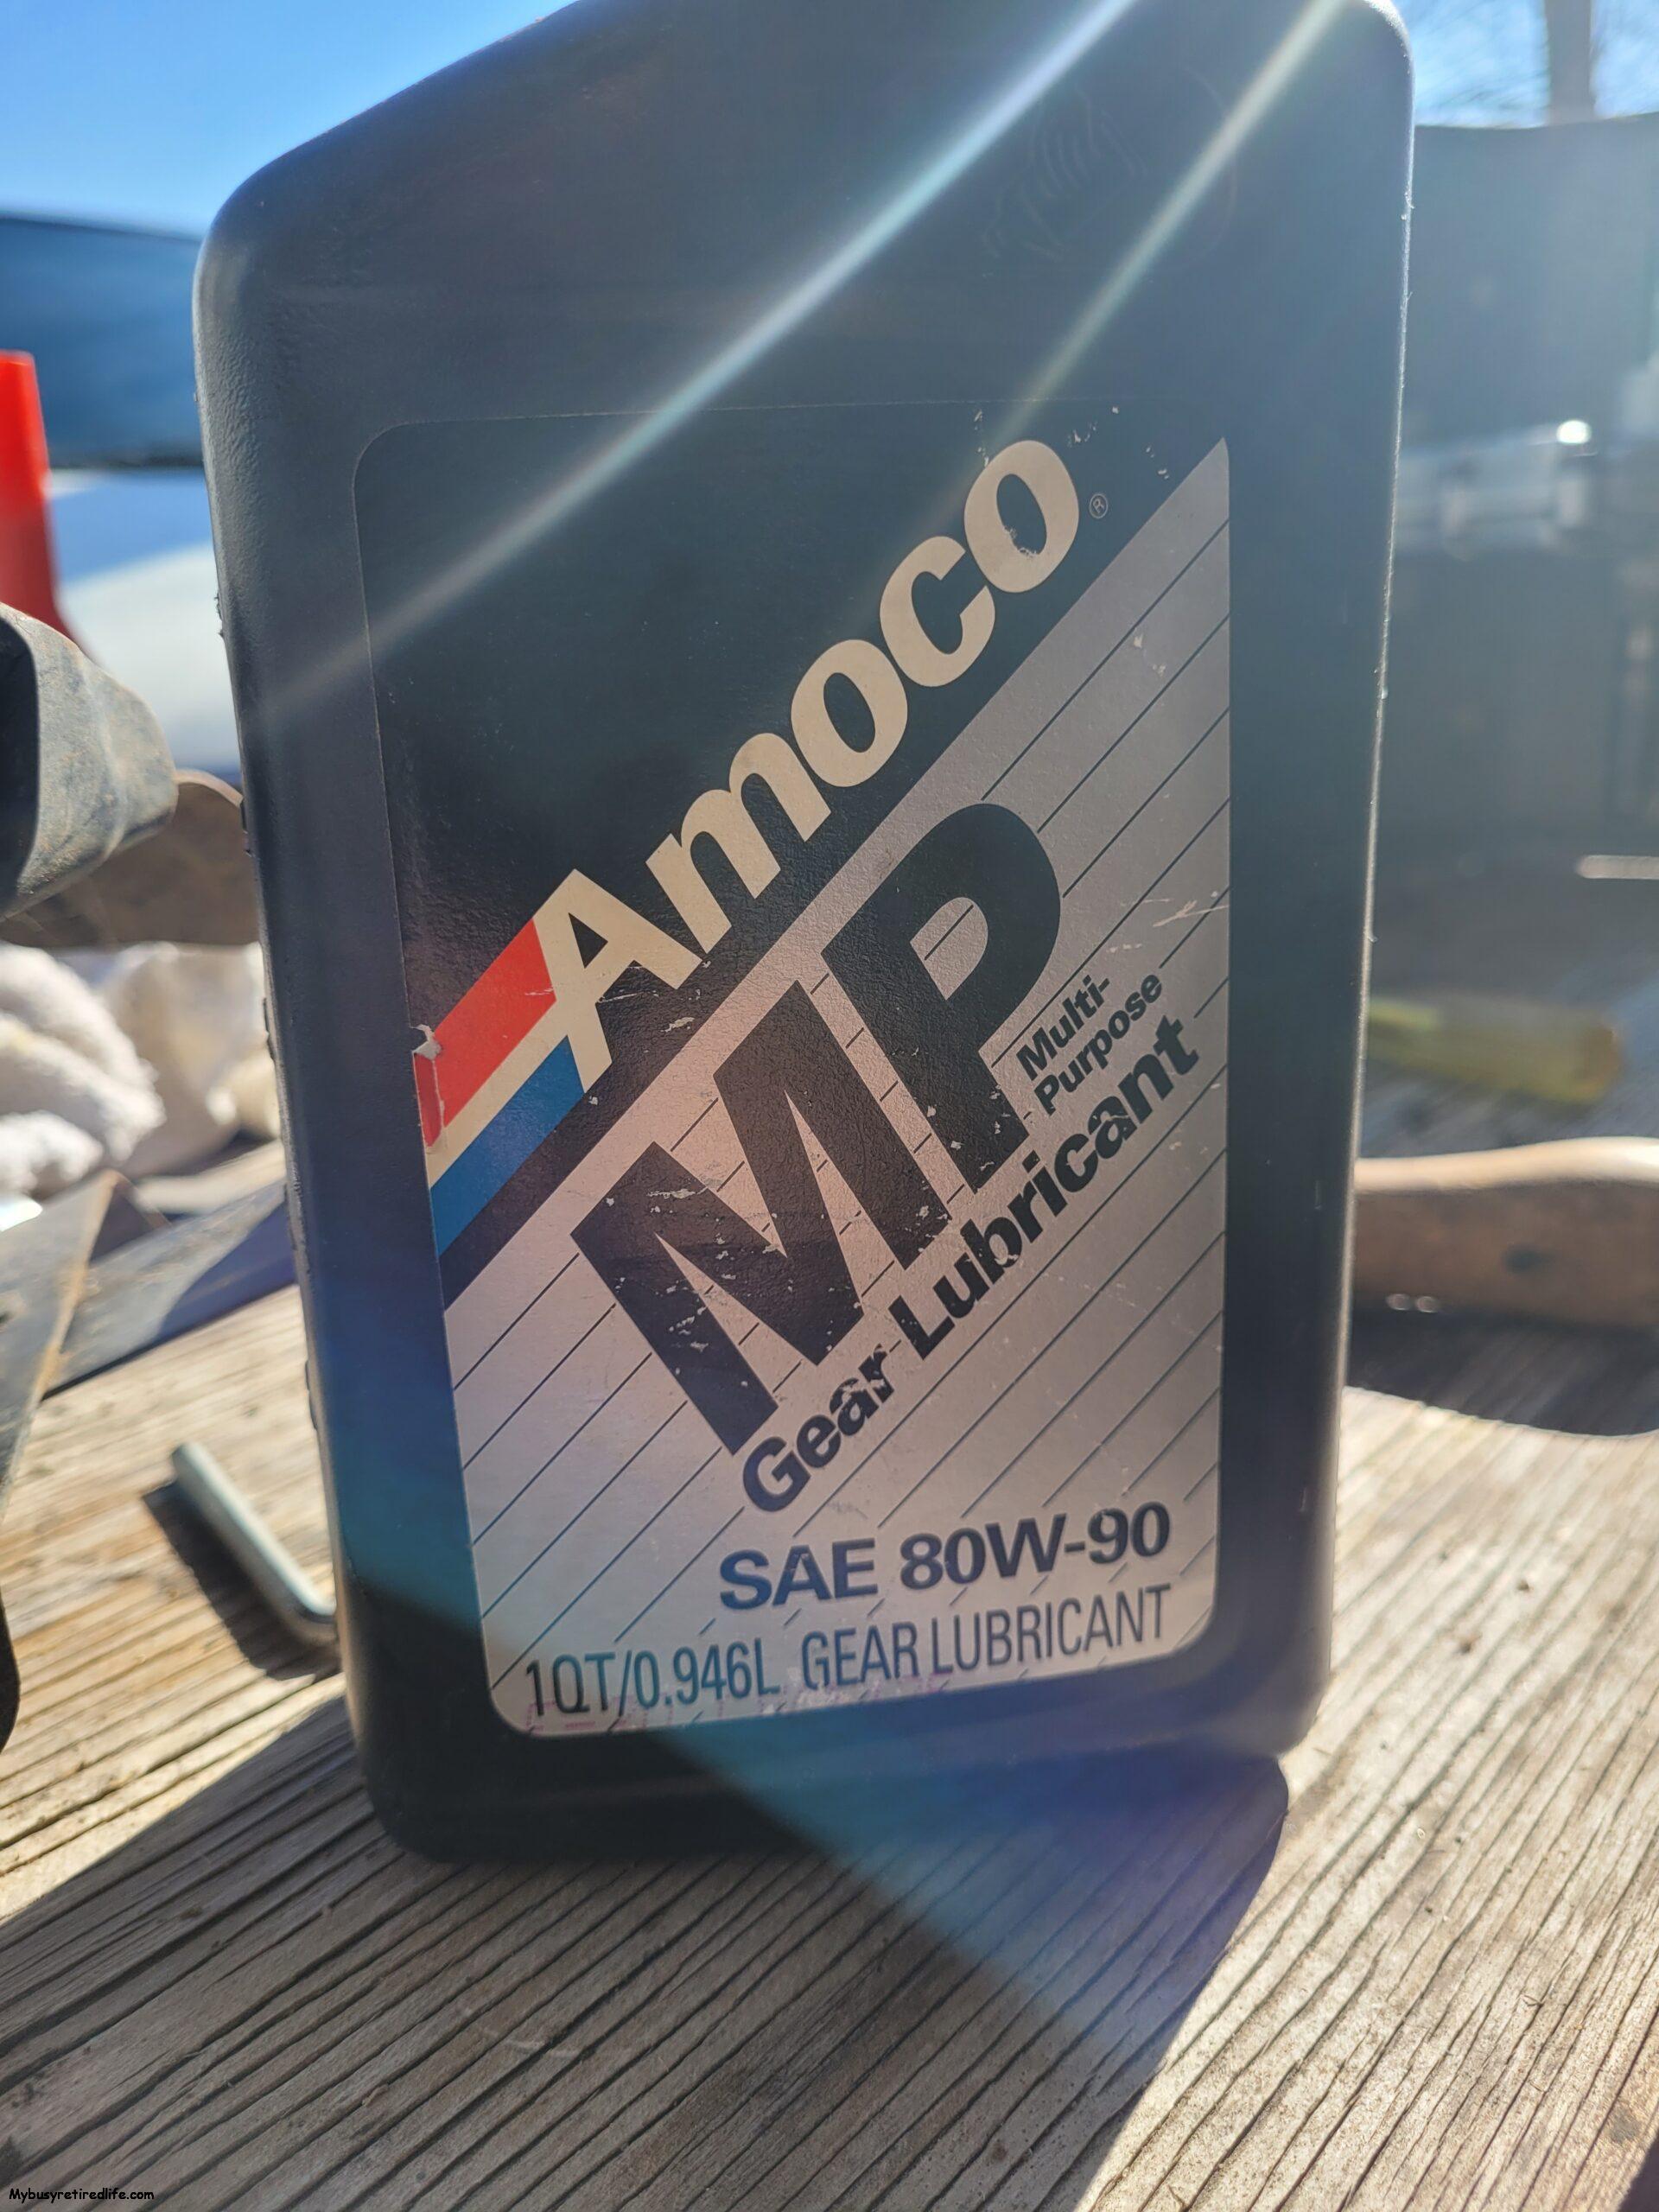
When I purchased the rototiller I noticed that the seals had been leaking. There was a large dirty area at each seal made up of dirt and oil. I noted that new seals could be in the future. At this point, I knew there was an oil leak but didn’t know if it was seepage or a large leak. But definitely, at the very least I was going to need to add oil to the gearbox. But what kind of oil? There was no manual provided with the tiller.
I gathered the needed information from the nameplate. The manufacturer name, the model number of the unit, and the word “manual” on a Google search, and I soon had a manual that stated I would need automotive gear oil(85-90 weight). It also pointed out where the oil level and fill plugs were located. As you’ll note in the photo above my oil is 80-90 weight. It works well on the high protective side(being the same number) and on the lower side, it only drops down by 5 points(what I would consider non-significant at that viscosity).
Cleaning the Oil Leaks
I cleaned the gearbox case before checking the oil for metal and filling the gearbox with oil. I consider this step to be crucial to a successful procedure. Why, do you ask? Well if the case is covered in dirt and oil how can you know if you have seepage or a large leak? It’s just more oil on an already oily surface. A clean case at the start will make a leak very obvious and help determine if it is seepage or a large leak.


Checking for Metal Particles
Checking for metal particles is going to require you to have the gearbox run for a couple of minutes to allow the oil to lift any metal particles from the lowest point in the gearbox and mix them into the oil. Then with a Q tip dipped into the oil fill hole pull it out and examine it for “shiny” particles mixed in the oil. The shiny particles will be indicative of metal.
For clarification, one or two particles may be normal wear and tear. At this particle level, this is where I would take note of it and keep an eye on the situation. One dozen or more particles on such a small object might be pointing to eminent failure. As for my experience with this tiller, there were no metal particles in the oil.
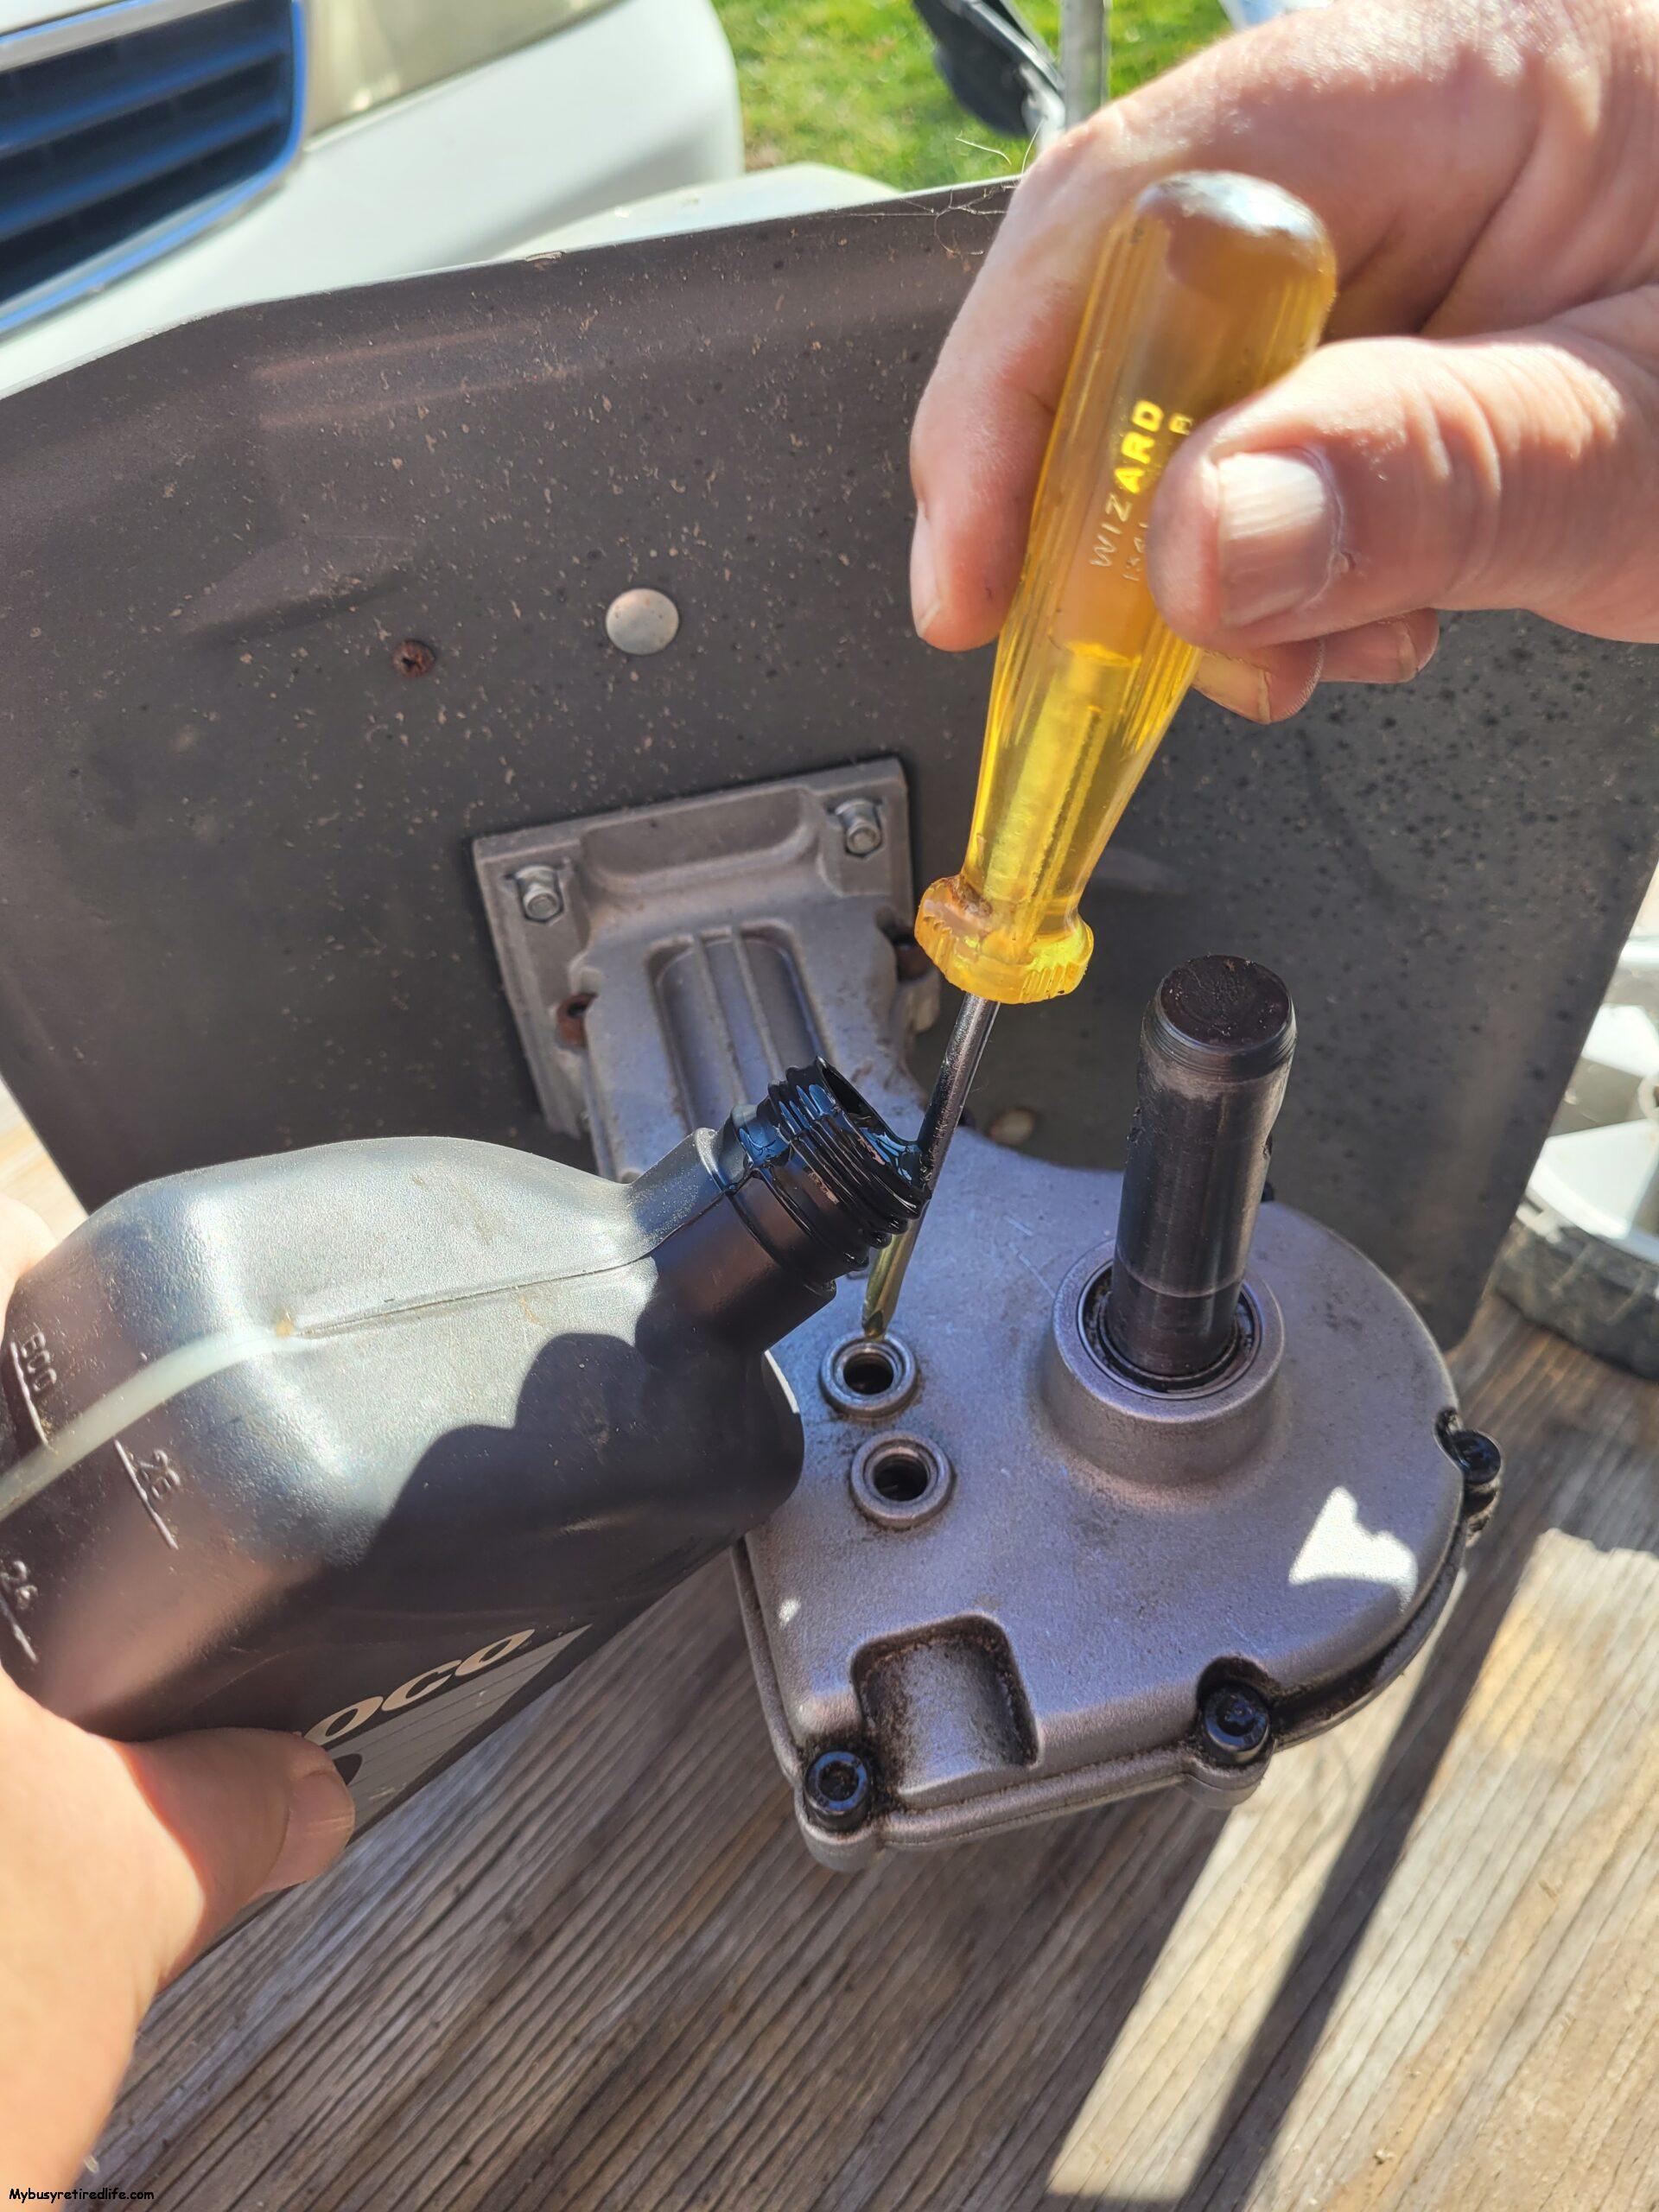
Filling the Gearbox
In my case, the gearbox turned out to be very low on oil. I needed to remove the tines and lay the tiller on its side before I could add oil to the fill port a little at a time. I didn’t have a funnel small enough to fit into the fill hole so I used a small screwdriver to allow the oil to slowly run along its shaft into the gearbox(see photo above). Then I would stand it upright and look for the oil to start to run out of the open oil level port. I repeated this step five or six times until the fluid seeped out of the oil level port(see photo above). I allowed the oil to continue to seep out until it stopped. This procedure ensured that the gearbox was at its “full” point and no longer overfilled when the oil stopped seeping out of the port.
Concerned About Overfilling the Gearbox?
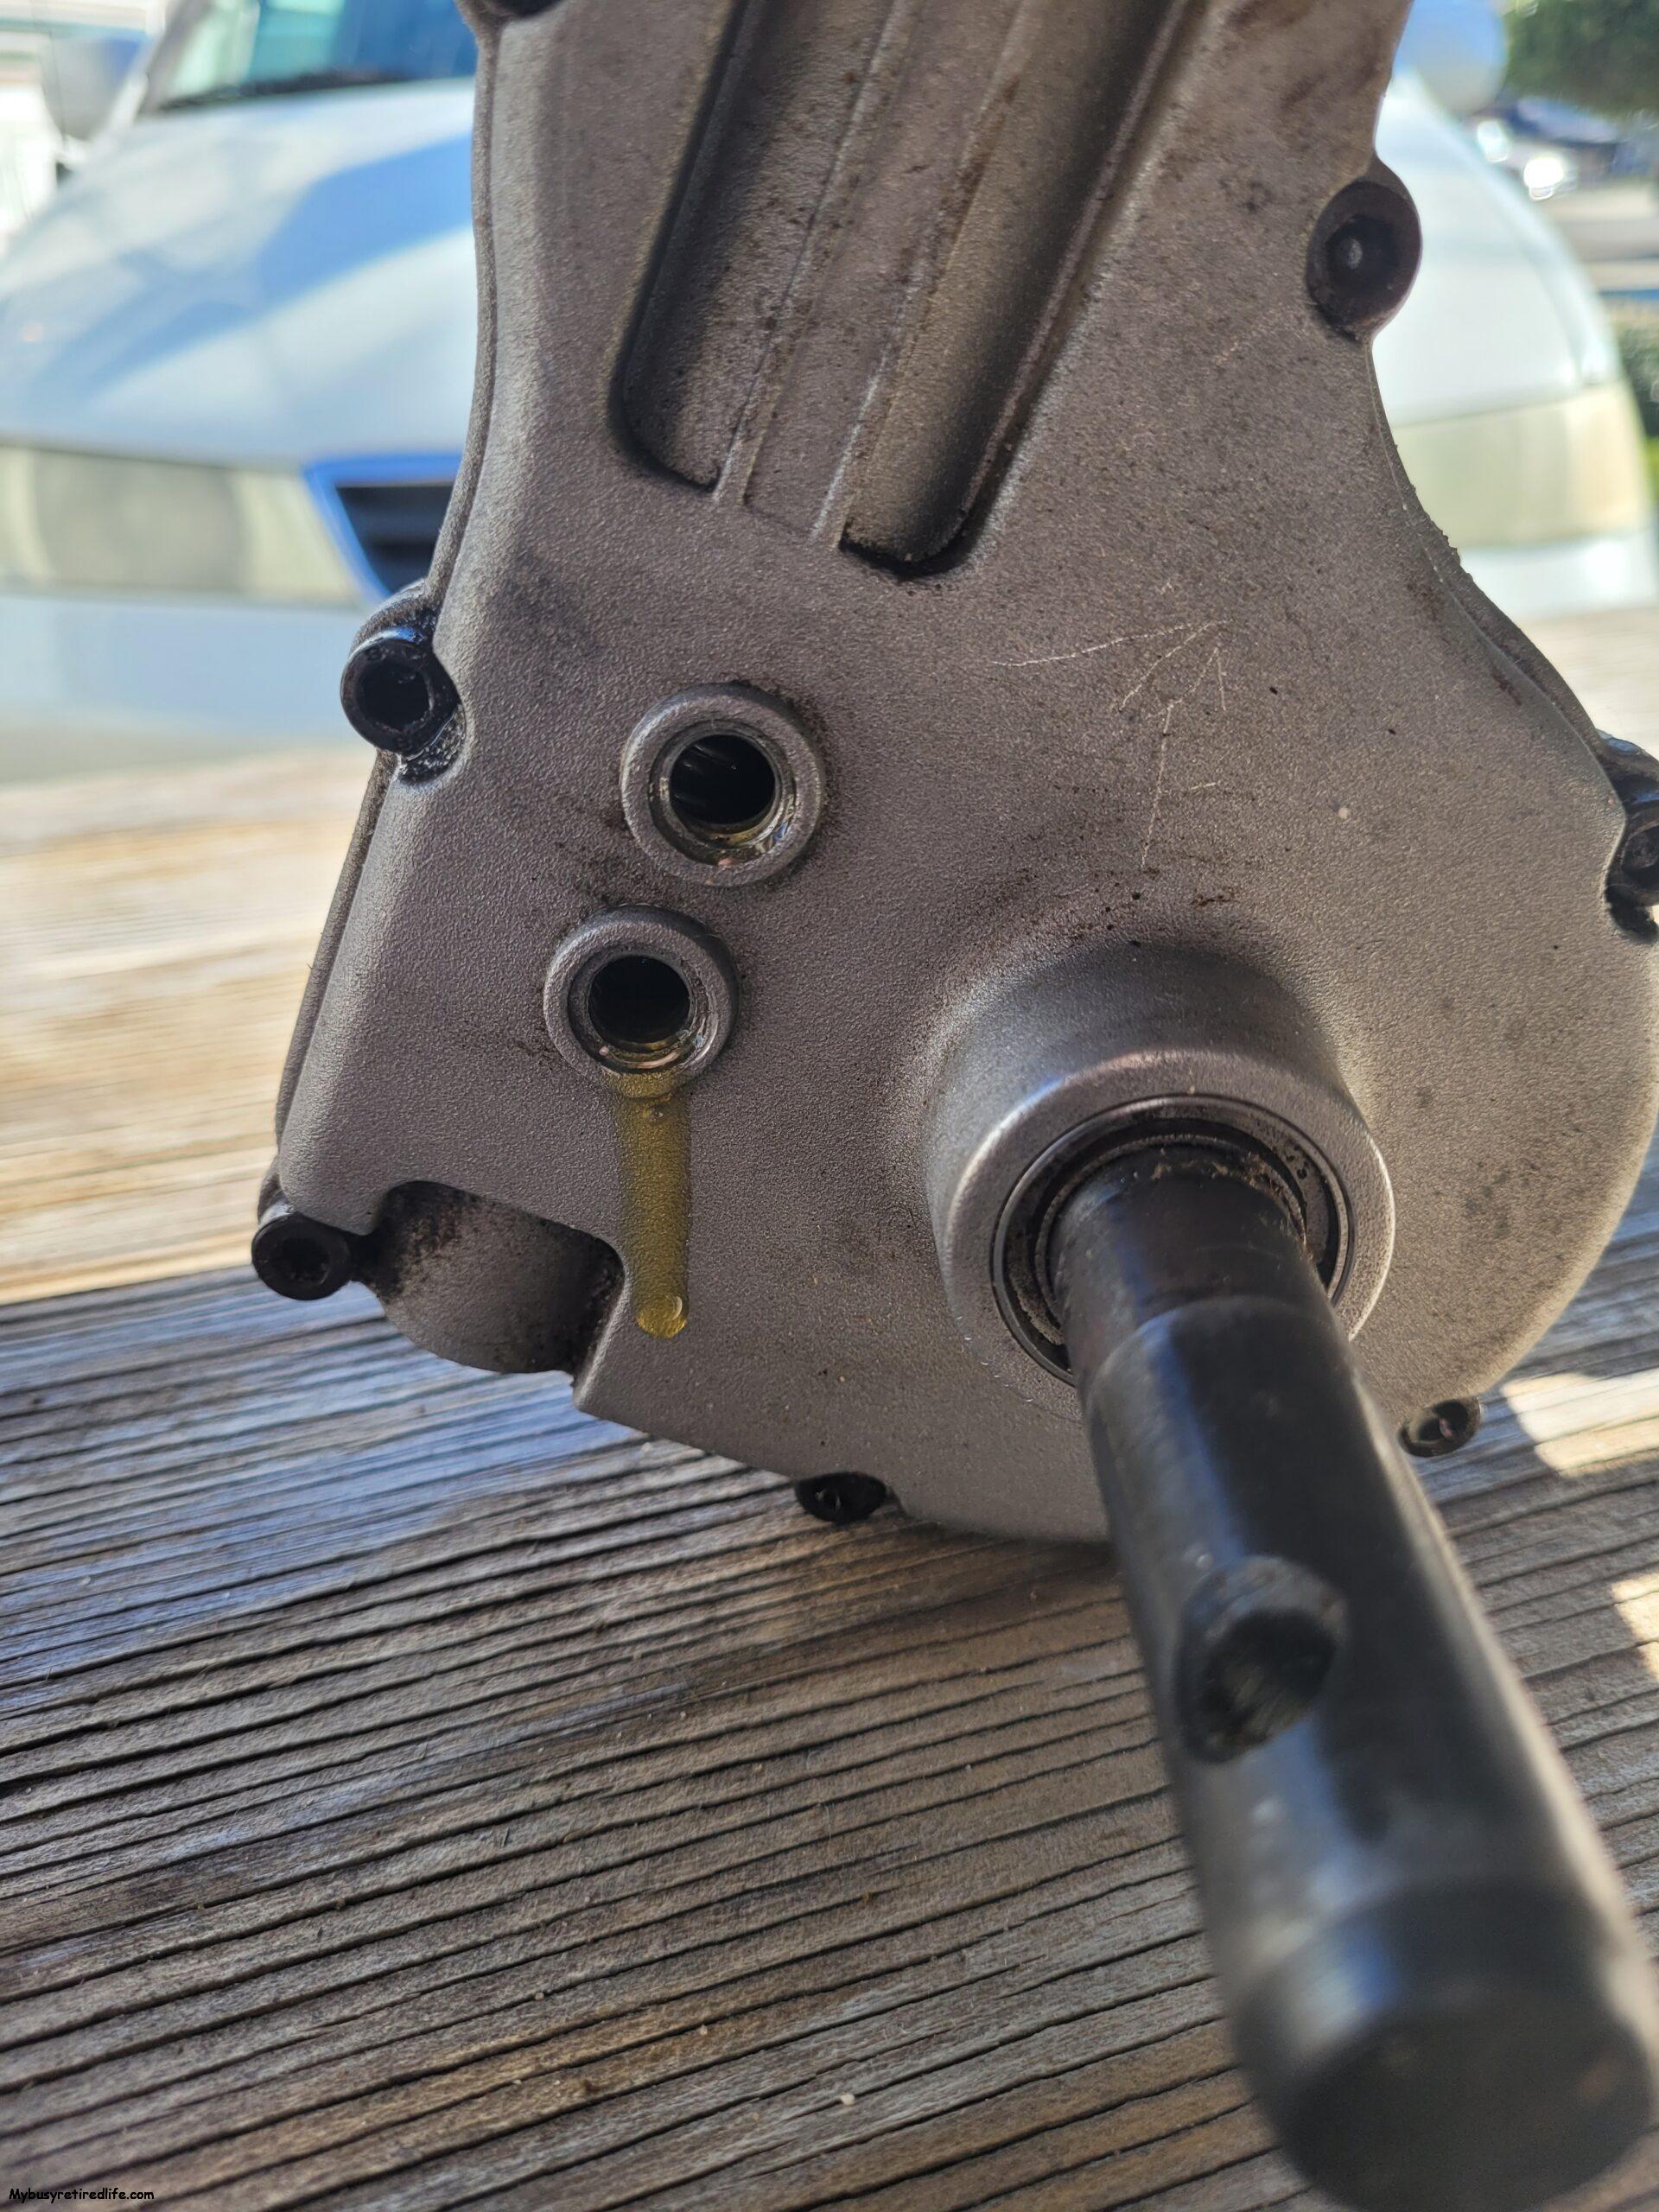
Why would I be concerned about the gearbox being overfilled? Good question, if the gearbox is overfilled the gear oil could(under operation) generate more pressure inside the case which will make leaks that are seeping become exaggerated and appear to be bad leaks. I can live with small seepage but bad leaks need immediate maintenance.
I cleaned and replaced the plugs(after filling the gearbox) for both ports and tightened them. Then I stood the tiller upright and let it stand for fifteen to thirty minutes. I checked the gearbox for leaks and found that the gearbox case was leaking at the lowest place where a bolt held the case together. I tightened(no torque specs were available for these bolts) all the bolts that held the case together, wiped away the seepage from the leak and again waited for another full-time period and checked and found no leak. Eureka! The seals at the tine shafts will need to be monitored for how much leakage is occurring at these points. Currently, they have not leaked.
Tightening bolts on gear case
Used Electric Rototiller Setup, The Tines
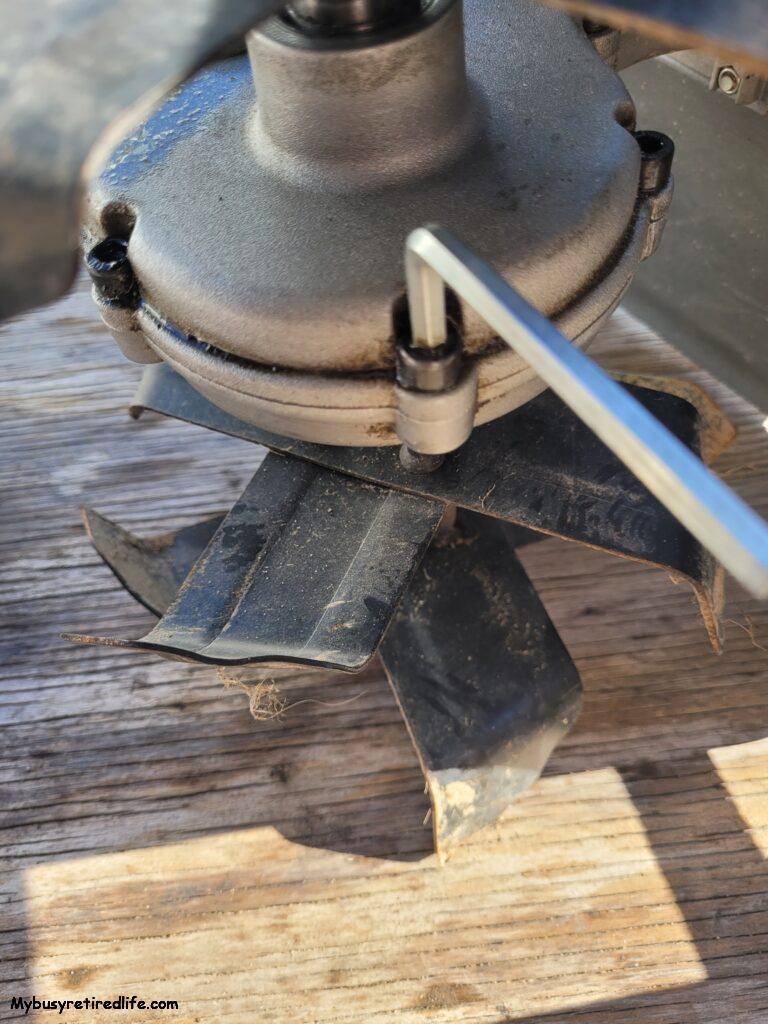
The tines can be installed incorrectly or may be dull or need replacement. You will need to observe the rotation of the shaft and look at the tines as they are mounted. Is the cutting edge leading in the rotation? If not you will need to remove them and reinstall them in the correct orientation. I found one entire side of my tines was facing in the wrong direction.
The Tines Cutting Edges
The next thing you will need to do is look at the cutting edge. Does the tine have a ground edge for cutting or is it blunt? Some tillers will have the tines ground with a cutting edge similar to a lawnmower blade. My tiller’s blades/tines were blunt(had never been sharpened). So I left the tines unsharpened. If I had needed to sharpen the tines balancing is not necessary. They rotate slowly compared to a rotary mower blade where balancing is mandatory.
The Tines Mounting Bolts
One last thing the bolt(s) that hold(s)/mount(s) the tines to the shaft will need inspecting for damage. If you find the bolts needing to be replaced replace them with the same grade of bolt. Don’t know which grade of bolt you have? Look at the head of the bolt. The markings on top of the head of the bolt will provide the needed information. Here is a link for finding your grade of bolts.
Everything Else
Everything else on the tiller is small parts. These parts include things like wheels, axles, cotter pins(if any), electrical connections, and switches. Most of these things can be verified with a visual inspection or through actual use of the part.
Conclusion
That’s it. My “new to me” tiller was ready to provide a long life of service. A used electric rototiller setup can be essential to its longevity. Now that I have my used electric rototiller setup I am confident that it will deliver a long life of service.
Feedback
I am curious have you gone through such an experience? What are your thoughts? Have I missed anything in this setup?
Related Article: How to Setup a Used Wet Saw
(Mybusyretiredlife.com All Rights Reserved)
(Mybusyretiredlife.com All Rights Reserved)
Liked This Post? You May Like These:
