Fence Post Replacement
This article is about fence post replacement or how to replace one or several fence posts or how to replace a post for a gate. The keywords are fence post replacement. So if your fence needs a post replacement no matter where it is or what it does this is the right place. The steps provided here cover any situation where a post(s) needs to be replaced. This procedure has you install the post in the ground without concrete(considered optional). Then all the parts(grass board, rails, and fence boards) are reused(provided they are not completely rotted) and reassembled with new nails or screws.
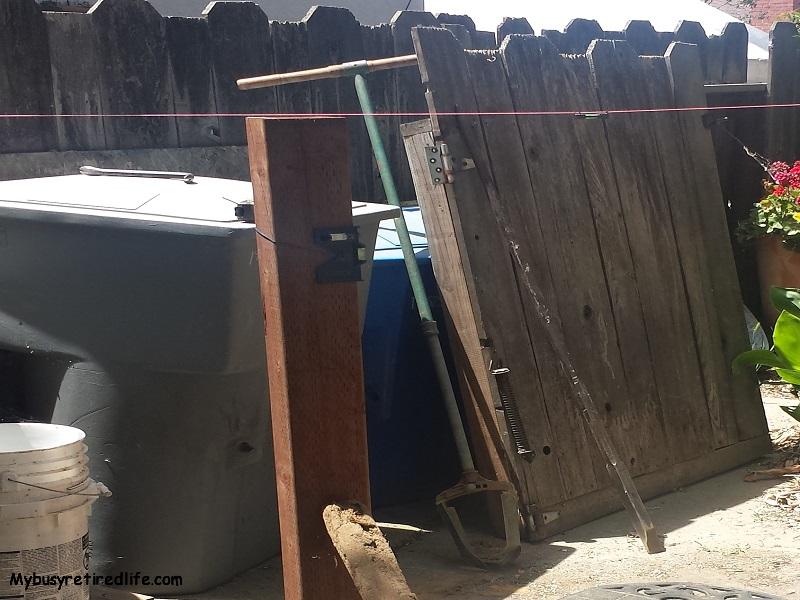
 Fence post replacement in progress
Steps to replace the post
So let us look at what needs to happen to complete this repair.
- Measure and record the distance from the top of the post to the top of the lower rail on the post to be replaced.
- Disconnect the fence or gate from the post to be replaced.
- Use mason’s string to establish the elevation position of the new post
- Remove the post.
- Finish the installation of the new post so that it matches the old post’s location and elevation exactly.
- Reattach the fence or gate to the new post.
Tools required for a post replacement job
You’re going to need a few specialty items as well as ordinary tools to make your life easier for this job.
- Round point shovel and or a post hole digger.
- Levels, post level and string level
- Mason String
- Catspaw and Claw hammer for extracting nails.
Disassembly
The catspaw and claw hammer are used to disconnect the fence boards, rails, and the grass board from the old post provided that nails were used. The boards(rails and grass boards) are left in place after they are disconnected from the post. A catspaw will make this part of the job extremely easy. You can use the hammer to strike the catspaw so that it gets under the nail head with very little damage and makes it easy to pry it out of the wood enough for the hammer to finish pulling out the nail.
I like the design of the catspaw that this video shows. It is very similar to mine. The important features of the tool is that the tool is very rounded at the prying ends and is built very heavily(thickness counts). The curvature of the tool helps to reduce the damage to the wood when you drive it under a nail. Also important is that the tool is very thick. The thickness is especially important when you strike it with a hammer to pull nails. Due to its thickness, you’re not going to easily damage your tool by bending it or warping it from the hammer blows.
Removing fence boards with little damage
Leave the rails, and grass board in place, disconnected, but still in place. To remove any fence boards use a small section of 2×4 between the hammer and the fence boards. This “block” will spread the hammer blows across the fence board and keep the boards from being splintered/damaged during their removal. Remove only as many fence boards as needed to clear the use of the post hole digger or shovel.
Post in concrete removal
Once the post is disconnected I will usually break it off at ground level(provided it is not encased in concrete) to make it easier for digging out the remainder. If your post is encased in concrete do not break off the post. Use it to help leverage it until you can remove it from its location. If your post is encased in concrete you will also need to decide if you want to break the concrete apart or remove it whole. It could be quite heavy depending on how much concrete was used to set it.
Either way, dig down along the concrete on one side only(see video below for the digging method). If you are going to break it out and you have a small sledgehammer, now’s the time to drag it out. You will dig below ground level and use your hammer to chip away at the concrete. If you are taking it out whole and you have a digging bar it works well when driven into the post cavity of the concrete. You drive the bar into the old rotted wood inside the concrete and then use the length of the bar to help rock the concrete loose.
Digging out the old post
This is the biggest part of the job. I don’t use concrete so it was pretty easy to use a post hole digger to dig a hole next to the old post. My posts are buried about three feet into the ground. When the old post is out of the ground then I expand the hole into the part where the old post had resided.
Caution rant ahead
I use an auger style post hole digger. I have found that the auger style will dig the smallest hole and it is the quickest at getting to the bottom of the hole with the least wear and tear on my body. Traditional style post hole diggers are body wreckers in my opinion. Once you use an auger style post hole digger there will be no going back to the clam style. Ok, ok I’ll put away the rant box.
Nails or screws?
To prevent splitting the wood with the new nails dull the point of the nail by standing the nail on its head and gently tapping the point of the nail with the hammer until the point has been dulled.
If you’re going to use screws they have an advantage over nails in that they have more surface area for gripping. The disadvantage is that they will significantly cost more than nails. Also, you will need to predrill all the holes to prevent splitting the wood(especially the fence boards) and you will need a tool to drive the screws into the wood. If you’re going to use screws I’d recommend using deck screws. They are heavy-duty, made for outdoor usage, and coated for exposure to the weather.
Mason String
The use of a mason string is essential and will help you get your post back to the same elevation as the old post. It is very easy to use. I use the point between the top of the post and the bottom of the top rail and usually slip the string between these two pieces. The string is used across three fence posts(see illustration below). To start simply tie the string to the top of the first post and pull it very tight past the post being replaced and tie it to the same place on the third fence post. The replacement post being in the middle. Now you have a reference point for your new post elevation. Make sure the string is riding the same edge of both good posts. This method also works well when replacing a gate post.
 How to use a mason string to establish new post elevation
Levels
Use a string level to verify that the finished fence will be level and in a vertical straight line to the rest of the fence. Also, another level called a post level is made especially for installing fence posts. It attaches to the new post and provides a level in both directions(as your facing the post this would be front to back and side to side). It indicates whether the bottom of the post needs to move side to side or front to back once you have the top of the post aligned to the mason string and at the proper elevation.
Concrete yea or nay
My experience is based on central-California weather conditions. We get about a foot of rain per year. As a young man I would set each post with a concrete wrap. I no longer use concrete around any fence post. My earlier use of concrete in the past has led me to conclude that the fence posts will rot out much quicker when there is concrete against the post. Even with our scant rain, the concrete seems to draw moisture from the ground like a sponge and holds it against the post.
The best example I have for using my non-concrete method is that I had a fence post(4×4) wrapped in concrete that was used to stop a gate. The concrete would wrap the post at ground level. The bottom of the post was open to the ground so any water that made it between the concrete and the post was not trapped. That post would only last 5-8 years then it would need to be replaced. I replaced that fence post twice in 12 years. Every time it was rotted out by water inside the concrete. I finally replaced it with a(4×6) without a concrete wrap and I have not replaced it since. It’s been over twenty years and it is still going strong.
 Auger type post hole digger, Digging bar, Mason string, String level, Post level, and Catspaw
Installing the new post
Installing the new post starts with wrapping a post level onto it. Then you insert the post into the hole and have the top of the post matched to your mason’s string for elevation and a straight line with the other posts. Add or remove a small amount of dirt until the elevation is correct. Verify that the new post position is closely matched to the bottom rails. Then check the bubble levels on the post level making sure that you move the upper part of the post so that the post is level and plumb. Use your shovel to lever the bottom of the post into position to the lower rails. When the post is perfectly aligned to the string at the top and both the bubble levels of the post level are centered you can start filling the hole.
Filling the hole
To start filling the hole I place a small amount of dirt(about 6-12″) into the hole. I then tamp it down around the post. Make sure that you do this for all four sides of the post.
Tamper? I intentionally did not mention a tamper in the tools required list. Because if you have a shovel you already have one. Huh? Take your shovel and turn it upside down and use the end of the handle to tamp the dirt into the hole. The shovel handle makes a very good tamping device. The weight of the shovel’s blade helps in the tamping action and the handle size makes it easy to get into the narrowest places and best of all it’s a free hidden tool.
Verify that the level bubbles and string are still correct and then repeat the filling process until the hole is filled and the post is very solid. You are very close to the completion of your fence post replacement.
Still using concrete to wrap the post?
If you must use concrete get some of the fence post concrete. It comes preblended and is super simple to use. Just pour it into the hole and add water. That’s it. If your post hole has gotten very wide use a small section of 8″ Sonotube. Cut the tube to the desired length and center it on the post. Install the Sonotube before reconnecting the grass board and rails. The top of the tube should not be any higher than the bottom of the grass board. Backfill the outside of the tube with dirt and dump your fence post concrete inside the Sonotube and add water. There are also alternatives to using concrete. It is a two-part resin that is mixed and sets up quickly.
Reattach everything
Nail or screw the lower rail to the new post at the same dimension that you recorded at the start of this job. Attach the grass board to the post. Nail or screw the top rail to the post. Then place your fence boards back in place. Be sure that you leave enough gap between fence boards to fill the entire fence board space(the fence boards have shrunk over the years and the entire gap will be wider than all the fence boards butted up to each other).
That’s it you’ve just completed a fence post replacement.
(Mybusyretiredlife.com All Rights Reserved)
(Mybusyretiredlife.com All Rights Reserved)
(Mybusyretiredlife.com All Rights Reserved)
(Mybusyretiredlife.com All Rights Reserved)
Liked This Post? You May Like These:
