Troubleshoot a Clogged Vacuum
I recently had to troubleshoot a clogged vacuum. I was going to vacuum the floor prior to installing a few rugs. The wife suggested that I run the vacuum over the scattered cat clay that had worked its way into the house from the garage.
 Stick Vacuums at Amazon
I pulled out my trusty stick vacuum and proceeded to not get anywhere. The vacuum kept going over the same spots and the clay stayed on the floor. I began thinking that maybe it was time to get a new stick vacuum. But there were a few things I needed to check before that happened.
Safety
Always be careful around running motors, belts, and brushes. You don’t want your hair, clothing, or jewelry near moving parts.
Basics first, Is the filter bag/canister clean?
I emptied the filter bag/canister of dirt and debris. With a clean filter, I should have had good airflow on this stick vacuum. It didn’t change a thing. Now I know that I have a clog somewhere in the air path of this vacuum.
Does the vacuum change pitch
Next, with the vacuum running I pulled the vacuum head off the stick vacuum. I immediately heard a change in pitch to the sound the motor was making. A pitch change is always an indicator that the amount of air being moved has changed.
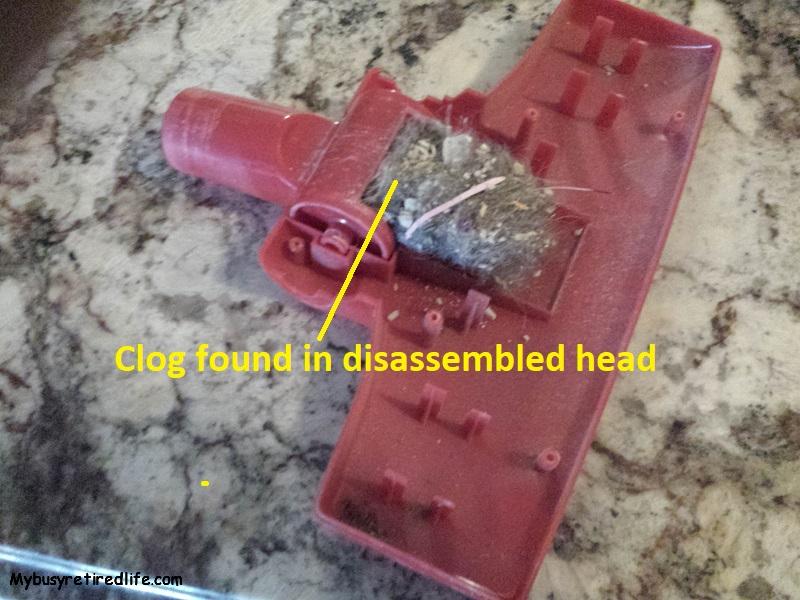
So I looked down the throat of the vacuum head and there was debris inside it. That debris should not be there. All debris is meant to keep moving from on the floor, to the head and on to the canister/filter where it should accumulate. It should not pile up anywhere in the air path except in the final holding area, the filter bag/canister.
Divide and conquer
Now I know that the stick vacuum is the most basic of machines. No hoses, curves, or handles in the air path from the floor to the canister. So if you’re looking to troubleshoot a standard vacuum you will need to check each of these pieces as it could contain the clog. But it is pretty easy to check off several of these pieces at one time just by removing the vacuum head from your hose and listen for a pitch change in your running vacuum.
Test your airflow with this simple step
Also as part of how to troubleshoot a clogged vacuum use your hand to determine the strength of the vacuum(airflow). With the vacuum running, remove the head from the vacuum or hose and place your hand over the hose. If the vacuum is strong at the hose everything from the hose to the canister is clear and not restricting airflow. So with good airflow at the hose and poor airflow at the head, it points the problem to a clogged head. If you’re dealing with a standard vacuum cleaner and the hose end has poor airflow go to the next place where you can disconnect the hose from the vacuum, and check for airflow. Continue your search until you find the place where the airflow improves.
Hoses a special case for low airflow
An item for low airflow can be the hose without a clog. Today’s vacuum hoses can be pretty thin and can develop cracks that can reduce your airflow at the vacuum head. So be sure to check your hose for cracks by moving the hose as the machine is running. As any cracks open up they will create a whistling sound when the crack opens and closes.
What if the airflow never improves?
Not very much airflow and you’ve checked the entire air path? This is going to be an all or nothing type of problem. Double-check your vacuum’s air path for clogs. Make sure that every part of the air path has been checked. Check that there is no second filter for air leaving the machine. Some machines have a filter to block fine dust particles from going back into the room once the air is leaving the machine.
Ok with the air path clear remove the filter/bag and turn on the machine. At this stage, there should be no restrictions in the entire system. If airflow majorly improves then the filter/bag may be restrictive or it may be saturated with fine dust if it is a reusable type. Install a new filter/bag or wash and dry the reusable types. If the airflow only improves by a small amount then it’s probably time for a new vacuum.


Clearing the vacuum head
In my case, it was pretty easy to clear the head.
- Loosen and remove the debris using a wire or a long thin screwdriver if possible.
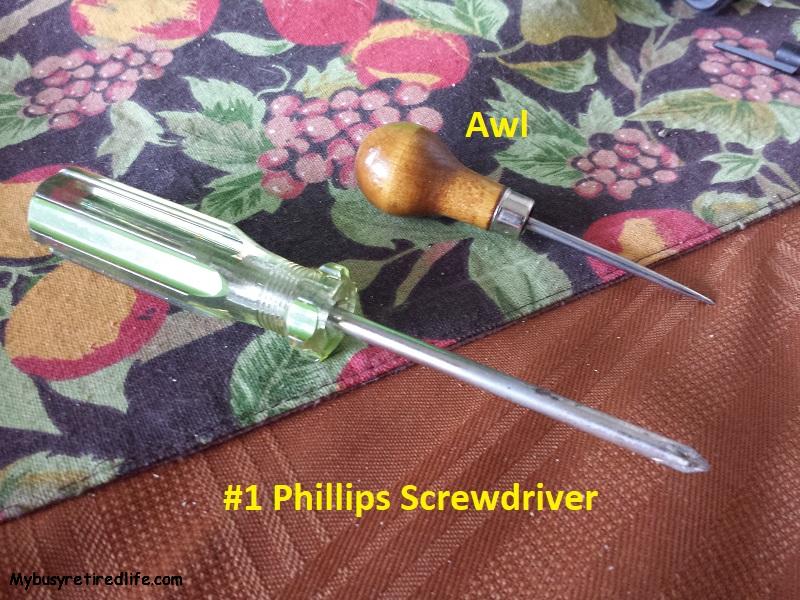
- If using the wire/screwdriver method does not work take the head apart by removing the screws(my machine needed a number 1 Phillips screwdriver) that hold the two main housing pieces together.
- Take the head apart slowly and note how it comes apart(you’re going to need to put it back together when it’s clean).
- Clean the debris from the air path.
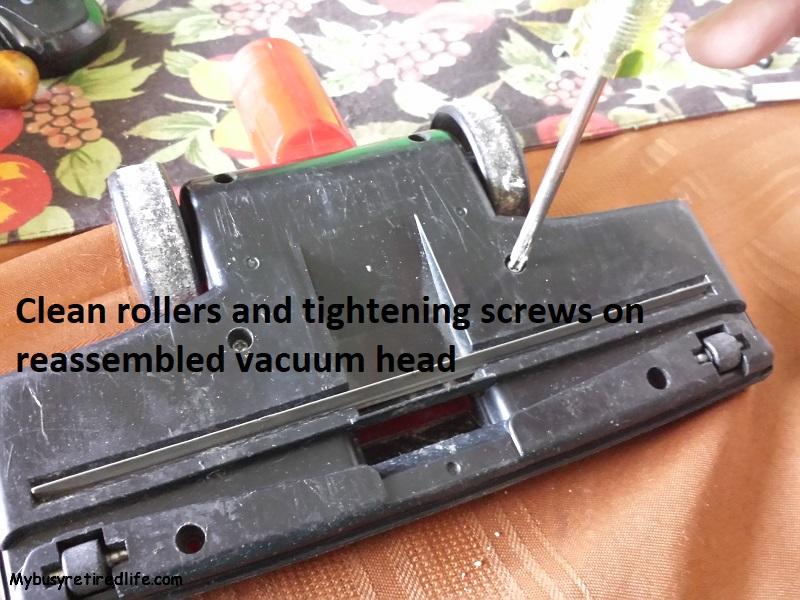
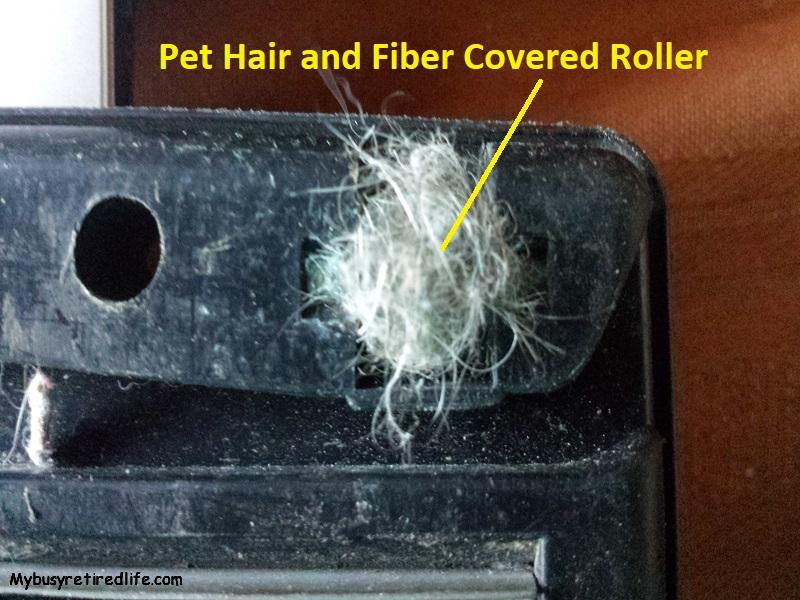
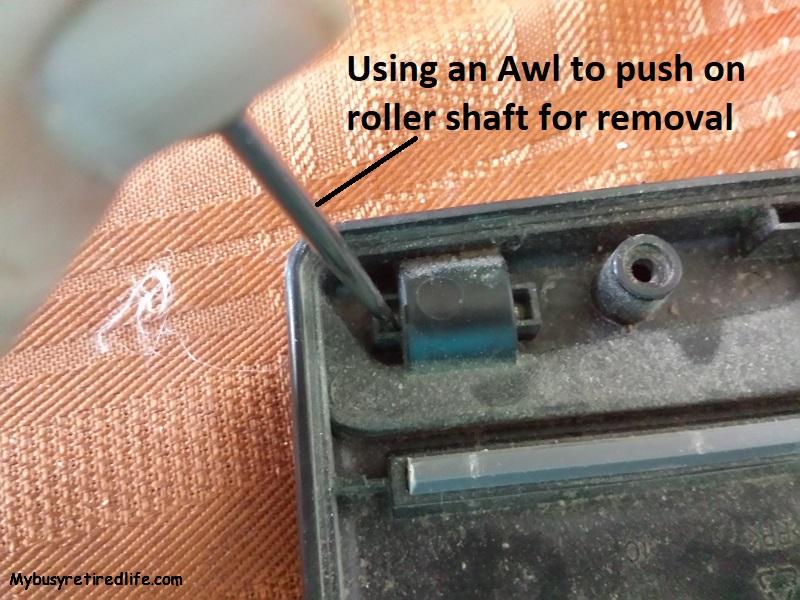
- Clean any additional rollers(if any) and their respective shafts of debris. I used an awl to push them out of the housing and a green scrub pad to clean both pieces.
- Do not oil these additional rollers as the oil will become a dirt and debris magnet which will clog them up in short order. If you feel you should lubricate these parts use a silicone spray.
- Reassemble the head and install the screws.
- Verify that the vacuum no longer changes pitch when you disconnect the vacuum head.
That’s it, my trusty stick vac is back to working as it should. A few minutes of how to troubleshoot a clogged vacuum brought it back to life and kept my money in my wallet.
(Mybusyretiredlife.com All Rights Reserved)
(Mybusyretiredlife.com All Rights Reserved)
(Mybusyretiredlife.com All Rights Reserved)
(Mybusyretiredlife.com All Rights Reserved)
Liked This Post? You May Like These:
