Remote Control Repair
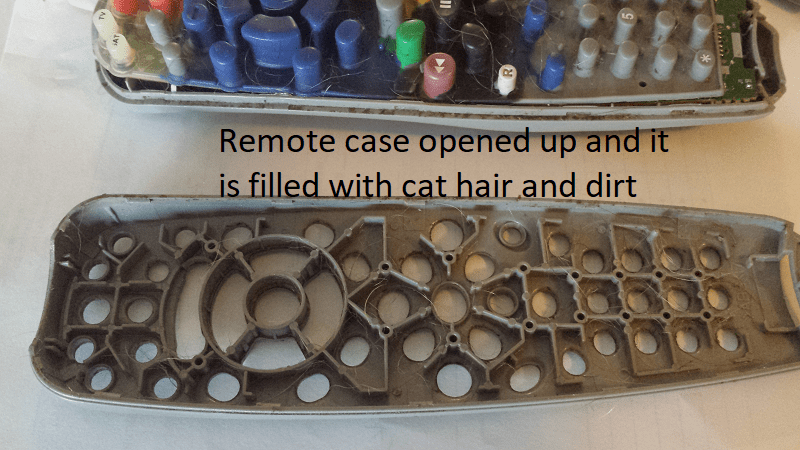
Remote control repair may be in your future. In many cases, your remote may not be working because too much dirt has built up inside between the PCB and the rubber buttons. If you have an old toothbrush, some cotton swabs and a bit of rubbing alcohol, carefully cleaning to remove any dirt or oils, may be enough to fix your remote.
If one of the buttons on your TV remote doesn’t work, or you have button or buttons that you must press multiple times to get the remote to work and you want to avoid a replacement remote, you can fix it yourself. Now for the bad news: Every remote is different, you will have to disassemble the remote using these general disassembly tips. These tips will work on any remote whether it is for a television or your car.
Prework before disassembly
Remotes consist of a plastic shell, a PCB(the green board), and a piece of rubber with the buttons. Before opening your remote, write down which buttons are broken and remove the batteries. So how do you know which buttons are not working?
Find those bad buttons
The camera can see the infrared signal that the human eye can not. Use your cellphone camera to tell you which buttons need work. How do you do this? I choose the camera on the screen side of the cellphone. Then while pointing the remote at the lens press a button and watch the cellphone screen. You will clearly see the IR signal on the screen. Do this for each button on your remote and log the buttons needing work.

Take photos and have a container
Take photos of your remote control as you dismantle it so you will have a foolproof method of getting all loose parts back into their respective places. Also, have a container available that your parts will go into as you remove them to prevent parts from growing legs and walking away. That’s it for the prework, let’s begin.
Screws first
Your remote may have small screws holding the remote together. Look in the battery compartment and under any stickers if there are any. Use a small screwdriver, to carefully remove the screws.
A spudger next
Now take apart your remote with a plastic spudger pry bar tool. Be careful not to use too much force, as it’s easy to break off plastic pieces or seriously gouge the plastic case. To separate the halves, press the spudger along the seam and look for flex in the case. Press in at those points and pry the case apart.
I’ve used blunt metal tools before and they always seem to gouge the plastic case. A plastic spudger will protect the case from gouging.


Clean those parts
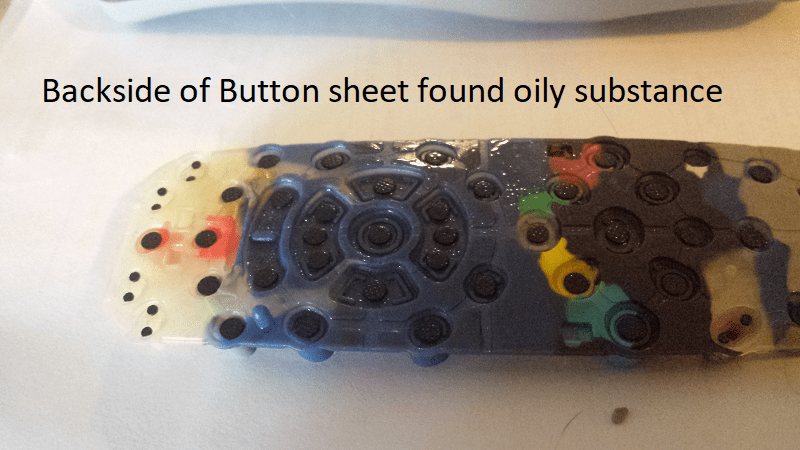
Inside you’ll find either rubber buttons or a single molded sheet of buttons. Dunk the rubber buttons, case and plastic buttons in a bowl of warm water and dishwashing liquid. Gently use a toothbrush on the parts to remove any debris, rinse all the parts with warm water. Be especially careful cleaning the contacts on the rubber button sheet. Pat them dry with a clean towel and let them dry. You can also use a hair dryer set on low to help dry the parts.

Wait don’t wash this part
Do NOT immerse the printed circuit board(usually a green color)in water. This part will be cleaned differently. You will only be cleaning the button contacts nothing else. The best cleaning solution for the circuit board is 90% rubbing alcohol. Just rub the circuit board button contacts with a swab dipped in alcohol. Clean all the button contacts and then change out the swab and repeat. The swab will be cleaner each time. When it is clean stop and let everything dry out thoroughly before reassembly.
If you had a spill on the remote and some of that spill has found its way onto your PCB carefully use the alcohol and swab to clean an residue from the PCB.
 Ok, now it’s time to reassemble the remote. Make sure that there is no residual moisture on any of the parts. Make sure that PCB is seated into the case and that the infrared senders are in place along with the battery contacts before assembly. Place the button sheet into the top part of the case for assembly. Carefully assemble the two subassemblies. That’s it you’re done. Install fresh batteries and test the buttons.
If you still have failure after cleaning
If one of the buttons on your TV remote still doesn’t work after cleaning, you can still avoid the cost of a replacement remote. Most remotes have electrically conductive paint on the bottom of each rubber button. You can buy a repair kit that includes the conductive paint. This is called a rubber keypad repair kit.

Tools for this Project
- a small screwdriver
- an old toothbrush
- spudger
- a digital camera
Materials for this Project
- 90% alcohol
- swabs
- dishwashing liquid
- clean towel
- hair dryer(optional)
Related Articles: TV articles
(Mybusyretiredlife.com All Rights Reserved)
(Mybusyretiredlife.com All Rights Reserved)
(Mybusyretiredlife.com All Rights Reserved)
(Mybusyretiredlife.com All Rights Reserved)
(Mybusyretiredlife.com All Rights Reserved)
(Mybusyretiredlife.com All Rights Reserved)
(Mybusyretiredlife.com All Rights Reserved)
(Mybusyretiredlife.com All Rights Reserved)
