Box Fan Weak Air Flow
I have a box fan weak air flow problem. I bought a box fan at the start of the summer months and as expected, it had great air movement. But I noticed that it was losing air volume almost by the day. So about six weeks after starting it up, I had to do something. I was thinking that the problem could be one of two things. The first being that the air was becoming turbulent and losing the efficiency of movement. The second reason could be that the motor just wasn’t spinning as fast as it should.
 Dirty Box Fan
Turbulence or blade speed?
Spin Down Time
A properly lubricated and balanced fan will have a “spin down” time. The blades should spin down until they eventually stop. If they stop abruptly when you turn the fan off and or it seems labored on startup, it needs cleaning and or lubrication.
As for the blade speed having slowed down, I had not taken an RPM measurement when it was new so I didn’t have a base against which to compare it too.
Disassembly
Now, this fan is no high-end fan. Most of it is plastic. The grates are plastic and the fan blades are plastic. So a few screws later(these screws are very small put them in a safe place for reassembly) the grates are off and the fan blades exposed. There was no set screw holding the fan blade hub onto the motor shaft. So it looked to be held on the shaft by friction. So I started by pulling on the fan blade hub at two locations 180º from each other(rocking it) and it came off.
 Dirty fan blade edge covered in pet hair and dirt
Cleaning the parts
Cleaning the parts required different techniques. The grates are a honeycombed structure. A brush with long bristles applied to it first in one direction and then in a perpendicular direction helped clean them. I had to do this for both sides of each grate. Afterward, I blew(used compressed air, air compressor or canned air can be used) any remaining dust out of the grates. An alternate cleaning method would be to place them on your deck/sidewalk and hose them off. Be sure that they are dry before assembly.
As for the fan blades, I applied soap and water with a small rag to clean the edges. Gently rubbing the blades with the rag removed the buildup. Another rag dried the blade assembly.
Optional
If you want more time between cleanings you can apply an anti-static coating to the blades. This is done with a spray or you can make your own with some fabric softener and water. You lightly spray a rag and rub the rag on the blade to coat the surface after cleaning.
DIY Anti-Static Spray
- 2 Tbs liquid fabric softener
- 1 Cup water
- Spray bottle
Pour the ingredients into a spray bottle and shake well. Shake bottle before using.
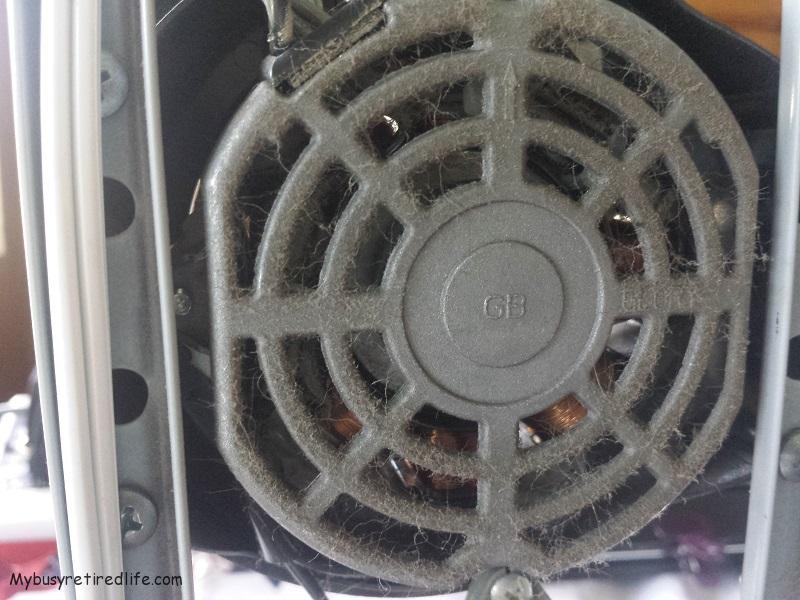 Dirty Motor Grid full of pet hair and dust
While removing the grates I noticed that the back of the motor where the cooling air enters was almost blocked with dust and animal hair. I did not want to disassemble the motor so I pulled out my vacuum and sucked up most of the hair and dust. Then I blew out any remaining dust with my compressed air nozzle(canned air or a high-pressure blower will work very well for this).
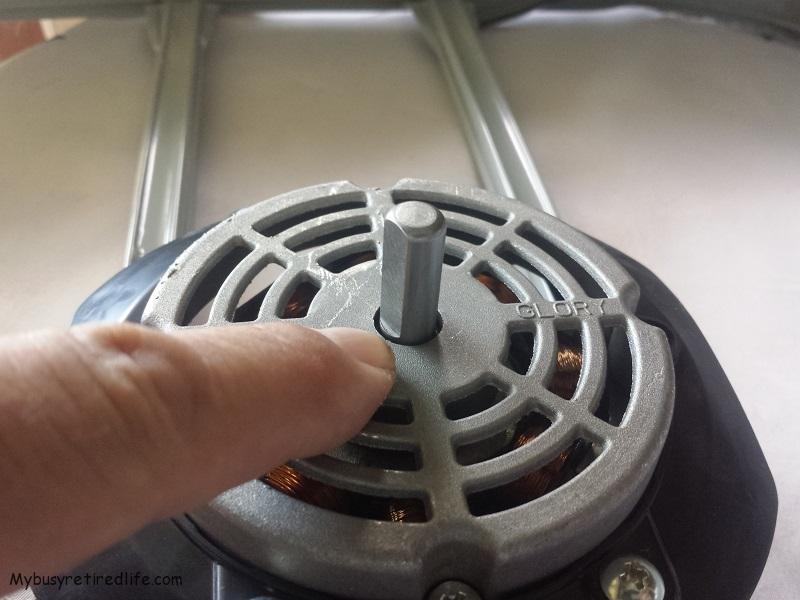 Gap where I added oil
Lubrication
The only thing that could help the air volume now was if the bearings were going dry(without grease or oil). Lack of lubrication could slow down the motor. If I wanted to do a thorough job I would need to disassemble the motor to get to both bearings. So I settled for oiling one of the bearings(my thought process was that heck, this thing is less than a couple of months old). I would be oiling the bearing most likely to get dirty since the air going into the motor was coming from the other end of the motor. I noticed that there was a small gap between the shaft and the motor housing. If a light oil(3-In-One) could get into that gap, it should do the job. So that is what I used.
I laid the fan motor down so that the shaft was vertical. I applied the oil sparingly(a few drops) at the gap as I slowly spun the motor shaft by hand. Spinning the shaft slowly because I did not want the shaft to spin the oil away from the bushing/ball bearing. The slow spinning of the shaft was to spread the oil evenly(or almost evenly) thru out the bearing. I left the motor in this position for about thirty minutes. If the oil hadn’t gotten into the bearing immediately it would have the best chance at doing so with time. I wiped down any residual oil left on the outside of the motor and assembled the fan.
 Hub assembly detail
I made sure to line up the fan blade hub’s flat spot with the flat spot on the motor shaft. This was the only tricky point in reassembly of the fan. When I got everything back together. I fired up the fan and boy was there a difference. The fan was running like it did when it was brand new. A great volume of air movement.
I should have tested it
I should have tested it for a before and after box fan weak air flow problem comparison. But I don’t own any equipment that tells me how much air volume is moved. So that got me to thinking how could I have tested it using materials from around the house and of course making sure the conditions for the test are identical. Here’s what I have come up with.
Air movement moves things that are lightweight. A ribbon would be to light. But a belt or strap with the buckle as weight may work. If I hung a belt so the buckle is in the air stream I could measure(visually or use a tape measure to be more accurate) how much air is being moved. The buckle would add resistance so as the air volume increases(success criteria) the buckle would move(rise or move away from the grate) with more air volume.
Test parameters
- I think that the length of the belt to the buckle would be important. If it is touching the grate and the buckle is hanging four or five inches away the same dimension should be used for each test(before and after).
- Also where the belt is placed on the fan grate should be the same. I think using a clock number position(3, 6, 9, 12) is a good method.
- The conditions outside of the fan should be identical. If you test it in one location make sure to test it in that same location.
The next time
I plan on using this test the next time I have to deal with this fan. The next time I have a box fan weak air flow problem.
Related Articles: Repairs around the home
(Mybusyretiredlife.com All Rights Reserved)
(Mybusyretiredlife.com All Rights Reserved)
(Mybusyretiredlife.com All Rights Reserved)
(Mybusyretiredlife.com All Rights Reserved)
(Mybusyretiredlife.com All Rights Reserved)
(Mybusyretiredlife.com All Rights Reserved)
Liked This Post? You May Like These:
