My Delta Faucet Leaks
My Delta faucet leaks. It doesn’t just drip when its turned off, it runs water out of the stem whenever I turn it on. It’s time to rebuild it. It’s a name brand faucet so I can easily find parts for it. But I need to take it apart first to make sure that my replacement parts are the right ones.
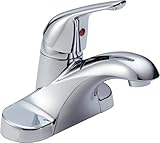
Delta Faucets from Amazon
![]()
Leaks
This faucet has developed leaks everywhere. Water is leaking out of the faucet when it is shut off. Also when I am using it, water is leaking out of the handle area(it’s a single-handle model). It’s definitely time to repair these Delta faucet leaks.
Caution: Rant ahead
Since my faucet is leaking out of the handle area when in use and dripping when not in use I need to do a full replacement of all the seals. If your faucet is only leaking in one state(on or off) then you might want to only replace the parts that are causing the leaks. My thoughts on this situation is that I want to go in once and not have to repair the faucet again in a couple of months because I did a piecemeal fix and put back old wear parts. Ok, ok I’m putting away the rant box.
Disassembly
I need to break down this faucet to the internal hot and cold water seats(officially called seats). So I need to start by removing the handle. There is a small plastic plug(red and blue color officially called a button) that is covering the set screw that attaches the handle to the ball. The small plug is easily removed using a pocket knife blade to pry it out of its hole. But I’m getting ahead of myself.
Down the drain
The problem with this repair is that you will be working with small parts and if you don’t want to have to do additional work you must block off the drain before you start working. Nothing is more frustrating than having to take apart the p trap drain to fetch a part that has fallen into it. So before I start I will need to shut off the water to both the hot and cold water lines. The shut-off valves are located under the sink in the cabinet. Then I will need to open the faucet to relieve any remaining residual water pressure. Once that has been accomplished I finally closed the pop-up drain and used an old towel to cover the pop-up drain and block any parts from entering the drain.
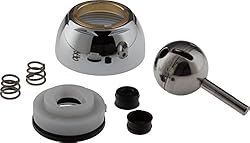
Replacement parts from Amazon.com
![]()
Remove the handle
I need to remove the handle first. The plug covering the set screw is removed by prying it away from the handle. I used my pocket knife blade. Then I found the right sized Allen wrench and ran into the first problem. The water in my home is extremely hard and it leaves a lot of deposits on anything it touches. So over the years since I installed this faucet a very thick crust has encapsulated the set screw.
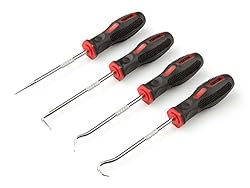
Pick and Hook Sets from Amazon.com
![]()
I needed a pick to pick at the buildup until I could insert the Allen wrench into the set screw. That brings me to the next problem. The set screw will only move a small amount. This is where I need a can of penetrating fluid/oil . A quick spray and then it is time to bring out the right technique to get the set screw out of the handle without stripping out the set screw or the hole’s threads.
Its time for a lot of patience. Moving the Allen wrench forward until it gets hard to turn, then turning it backward and repeating these movements in small increments and spraying penetrating oil is the technique I need. I manage to get the set screw to move a quarter turn before it tightens up. More backing up and forward motions and liberal use of penetrating fluid and I am soon up to a full turn. I repeat this technique until I finally manage to remove the set screw.
Vinegar is needed
The set screw is out but the handle does not want to leave the ball stem. I need to remove the handle without scratching the faucet. I need to gently pry on the bottom of the handle with a non-metallic pry bar. First, pry up and then push down then up and then down until the hard water crust has been broken down.
It’s time for a small amount of white vinegar. I have an old jar that I used to hold the vinegar, a zip lock baggie could also work. I toss the set screw and the handle into the vinegar. They will soak as I am removing and replacing parts. The vinegar will break down the hard water deposits.
The next thing that needs to be removed is the bonnet nut and cap. There are small flats on the top of the cap, so a large wrench can be used to loosen it. I need to be careful that I only use the wrench on the top part(where the flats are located) in case I should scratch it. Covering the nut with a thin rag will help reduce potential scratches. I want to remove the nut from the cap but it is frozen in place by the water deposits. Once I have removed it from the faucet the whole thing goes into the vinegar. I have to make sure that there is enough vinegar in the jar to completely soak all the surfaces of the parts.
Keys
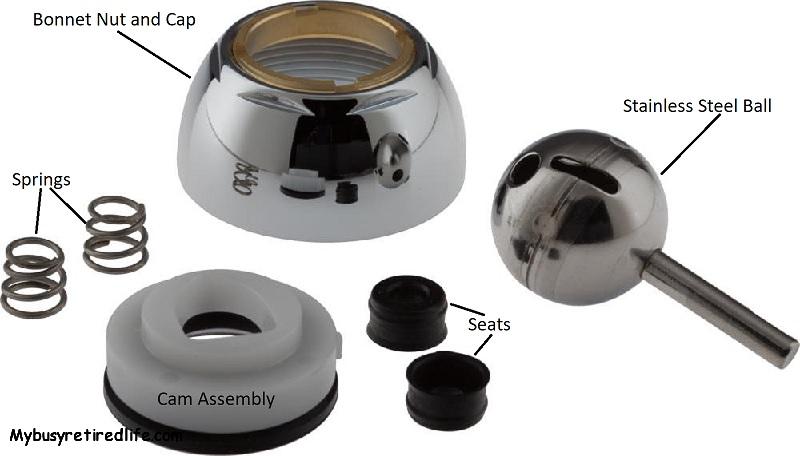
It is important to note that there are two parts of this faucet that can only be installed in one position. These parts are the ball and the cam assembly. The ball uses a pin on the body of the faucet and a slot on the ball to hold it in the proper relationship to each other. The cam assembly uses a slot in the body and a protruding part on the cam to keep the two pieces in a proper relationship with each other.
Once the nut and cap are removed the cam assembly can be lifted off the ball. Be sure to note how and where the key is located. The cam assembly removal will uncover the ball. Again note how the key for the ball works and where it is located before removing the ball.
Once the ball is removed the seats and springs are exposed and can be removed with a pick or small screwdriver. Pay close attention to the springs. My faucet’s springs are tapered with one end being larger than the other end. The replacement parts I purchased came with two sets of springs. Be sure to install the correct replacement springs in the same position.
Installation
Install the seats and springs into their holes. The seats are interchangeable with no special seat for the hot water only. I placed the spring and new seat on a small screwdriver. Then I inserted the screwdriver into the hole where the seat will reside. I then removed the screwdriver. Then while using my thumb to hold down the seat I gently used a pick(a small screwdriver will also work) to push the seat’s skirt into the hole until the seat was back in place. I repeated this process for the other seat.
Inspection
It’s time to take a close look at the ball and cam assembly if you plan on reusing them. Take a close look at the surface of the ball making sure that there are no nicks or worn areas that will contact the new seats or the cam assembly. Use your fingertip along suspect areas to check for nicks. If you find a nick or worn area its time for a replacement ball.
Lubrication
The ball is going to rub the seats and the cam assembly packing every time you use the faucet. So I used some plumbers grease to lightly coat the surface of the cam packing and seats.
Improvised adjustment tool
My favorite pocket knife
![]() Install the ball with the pin in the slot key. Then install the cam assembly over the ball, again paying attention to their key parts. Push down on the ball while installing the cap and nut to make sure the key parts are properly aligned.
Install the ball with the pin in the slot key. Then install the cam assembly over the ball, again paying attention to their key parts. Push down on the ball while installing the cap and nut to make sure the key parts are properly aligned.
The nut on the cap uses a special wrench that is provided with the faucet when purchased. It has been to many years since that date and I have misplaced that tool. So I grabbed the nut and cap and using the back of my pocket knife blade inserted it into two of the slots of the nut I checked if it would move. The vinegar had done its job. The nut moved easily. I turned the nut until it was out of the cap then back in again to make sure that all the threads on the nut were clear of any buildup.
Cam seal adjustment
I backed off on the nut and making sure the cam assembly key was aligned I installed the cap while pushing down on the ball. I tightened the cap by hand. Then I turned on the water and checked for leaks. With no handle on the faucet, I could easily verify if there were any leaks. There were leaks.
So I looked at the relationship of the cap to the faucet body and it appeared to me to be too large of a gap between the two pieces so I tightened the cap some more. I checked for leaks again and it still had leaks. This time I tightened the nut using the back of my pocket knife blade. The knife’s blade bridged two of the slots in the nut allowing me to turn the nut. The next leak check revealed that I had finally achieved a good seal, no leaks.
I pulled the set screw and handle from the vinegar and cleaned the handle of any remaining buildup. I installed the set screw and verified that it could be turned easily into the handle. After that, it was time to install the handle and tighten the set screw to the ball. Insert the red/blue plug into the handle to cover the set screw and my job was complete except for the cleanup. My Delta faucet leaks have been fixed.
Related Article: Cleaning a Faucet Aerator
(Mybusyretiredlife.com All Rights Reserved)
Liked This Post? You May Like These:
