Bifold Door Installation
Do you have a bifold door installation on your horizon? Are you nervous about installing these type of doors? You’re in good hands, this article will walk thru a complete installation. It also includes how to set up the doors to the opening.
It seems that each bifold manufacturer can have slightly different(but similar functioning) hardware. So each installation can have a few unique parts made only by that manufacturer. But those unique parts still share the same function. It’s that same function that will make the unique parts not all that hard to install. This is what happened to me recently when I installed a bifold door. I’ve installed a few bifold doors and the installation process is always very similar. However, the hardware for the doors made the installation slightly different each time.
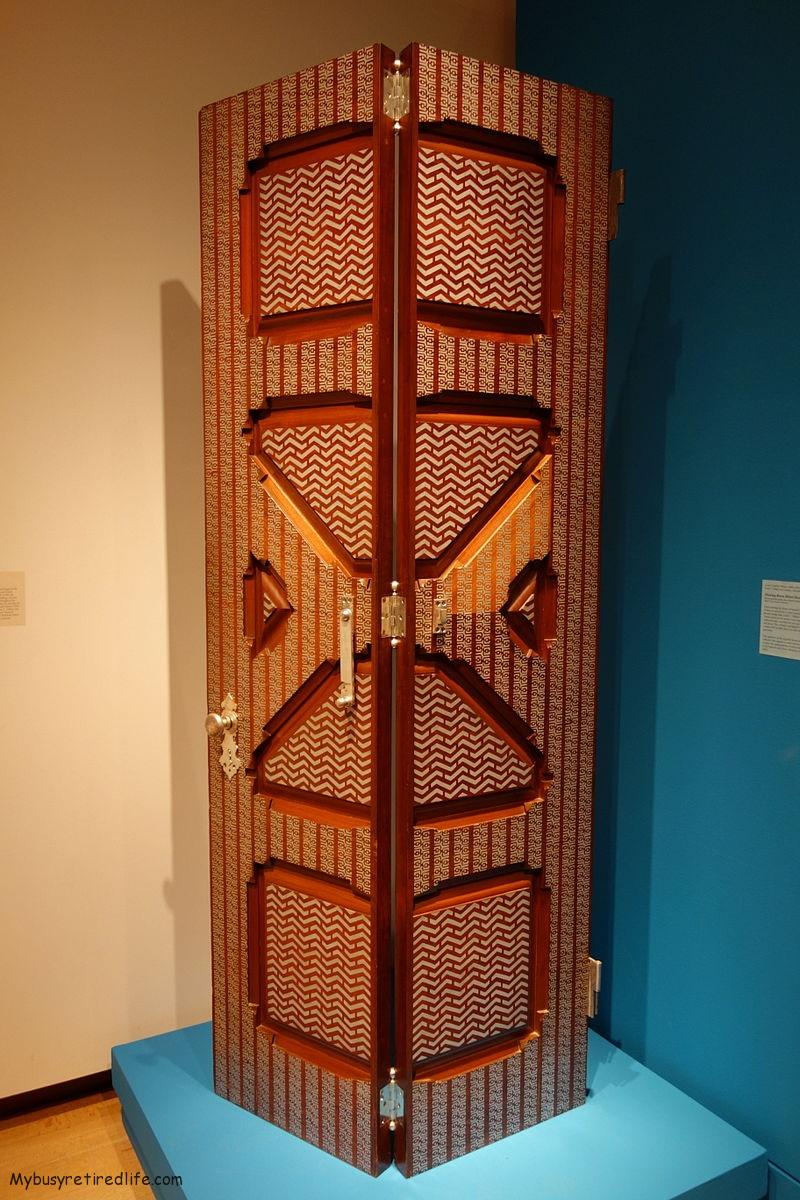 A really fancy bifold door
The installation process for a forty-eight-inch door can be boiled down to a generic installation version that will work on any pair of bifold doors. Just acquaint yourself with the hardware parts and follow these steps.
The doors are built so that there is a longer panel(usually the top of the door) and a shorter panel. The shorter panel is usually the bottom of the door. Make sure that you are working on the correct panel when assembling the door hardware.
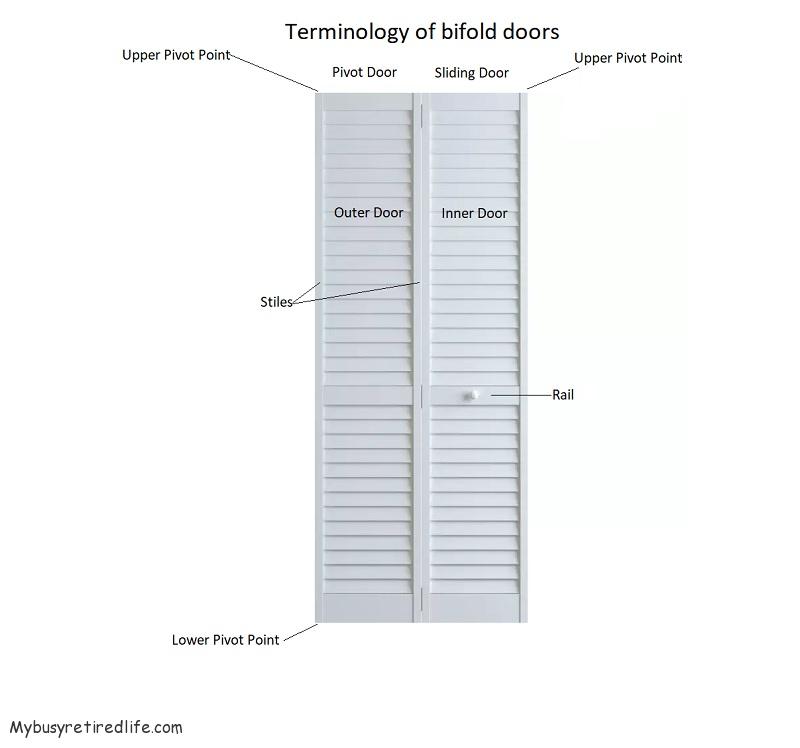 The terminology of bifold doors used in this article
Assemble the doors
- Install the pivot point parts(3) into each pair of doors.
- The top door pivot point has a pin shape and is spring-loaded and the inner sliding door can have a guide wheel or a guide cap pin(also spring-loaded). Both guide wheel/cap pin follow or slide along the track.
- The lower pivot point is usually adjustable in the height dimension. It’s made up of a threaded rod with a grooved gear-shaped head and an insert with matching threads. The insert is inserted in the bottom of the pivot door.
- The inner moving door does not have pivot hardware on it’s lower end(even though it can be drilled for one).
Install the upper track
- Install the upper track. The track can be a single piece or it can be made up of two pieces.
- Measure the wall thickness of the opening(example 2×4 wall with 1/2 inch drywall on each side of the 2×4 = 4 1/2 inches) for your door.
- Draw a centerline along the entire width of the top of the door opening.
- Determine if you need to cut the track for the door opening(see “a” below).
- Attach the track sections at the wall end with one screw each on the centerline.
- Join the two sections in the middle of the opening.
- If you are installing a two-piece track use a straight edge/straight board attached to the door opening to keep the track sections straight. If needed get a helper to hold the straight edge/straight board in place while you screw the track in place.
Cutting track to fit the opening
- You may need to cut the track to fit your opening. For a two-piece track installation cut off the end nearest the wall of one of the pieces. This location will make the cut less likely to be noticed. Be sure to loosen the top pivot track bracket and move it away from the cut area.
If you have to cut the track you may need to add a new hole near the end from which you have removed material. - Find the hole size in the track by using a drill bit in the existing holes of the track until you find a drill bit that closely matches its size.
- Drill a new hole approximately the same distance from the cut end as the uncut end of the track. Be careful not to drill the new hole to close(no closer than one inch) to any existing hole near the cut end.
- If you are attaching the track to a solid wood surface the manufacturer provided screws should be sufficient. If you are attaching the track to a drywall covered area you will need longer screws. Estimate a half-inch for the drywall thickness and at least an inch for the wood(2×4) under the drywall for a solid connection.
- Note if your inner moving door is using a pin and guide cap block. You may have to pre-assemble the block in the track before installing the track.
- Your door set may use a snuggler bracket(this part can be optional, check your manufacturer instructions) to keep the doors closed. It is installed in the track between the two center door wheel guides or guide caps.
- You may need to cut the track to fit your opening. For a two-piece track installation cut off the end nearest the wall of one of the pieces. This location will make the cut less likely to be noticed. Be sure to loosen the top pivot track bracket and move it away from the cut area.
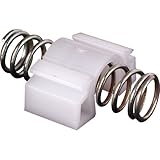
Bi-Fold 4-Door Snugger
![]()
The snugger is used to hold your doors in the closed position. It is self-aligning and consists of a spring and a small nylon bracket that fits onto the upper track. To install this piece it is sometimes a simple snap-in-place type of gesture. But with other designs, it needs to be preassembled onto the track before the track is mounted. Then again depending on your manufacturer, you may not even have this piece.
Install the bottom pivot brackets
Install the bottom pivot brackets.
- At each end of the track hang a plumb bob from the center of upper pivot track bracket hole and locate the center of the bottom pivot brackets at the floor.
Mark the center on the floor and the wall. - Attach the brackets to the wall with screws. Standard supplied screws for wood and longer screws for drywall installation. Mounting screws for this bracket consists of two screws for the wall and one for the floor.
- If your floor is made up of tile under the bottom pivot bracket you may want to drill a hole thru the tile with a special masonry drill bit so a ribbed fastener can https://www.thisoldhouse.com/bathrooms/21019320/drilling-holes-in-tilebe embedded in the tile and backer board for the screw. If you’d like to see the process with some tips in drilling holes in tile this video has a lot of good tips.
- At each end of the track hang a plumb bob from the center of upper pivot track bracket hole and locate the center of the bottom pivot brackets at the floor.
Hanging bifold doors
Install the doors on the upper pivot points.
- Guide the doors onto the upper track pivot point and the roller into the track.
- Lift the door and place the lower pivot point on the bottom pivot bracket.
- Repeat for the other set of doors.
Plumb one set of doors.
- With the door fully closed use a large level on the inside door edge.
- Prepare to move the upper pivot bracket by loosening the screw/bolt.
- Slide the upper pivot bracket and tighten the screw/bolt.
- To adjust the lower pivot lift the door off the bracket and move it to a new place on the pivot bracket to achieve plumb.
- Back away and look at the door edge at the wall. The door should appear to be parallel(technical term would be “to eyeball it”) to the wall.
- Adjust the other set of doors at the pivot points so that they are parallel to the first set of doors and with a slight gap between doors.
Center the doors to the opening.
- Step back and look at the spacing from the doors to the wall opening on each side.
- Adjust the set of doors that needs to move closer to the wall.
- Look at the gap between each set of doors and adjust the door you just moved until they appear parallel again.
- Move the other set of doors until they are again parallel to the other set of doors.
- Repeat until both sets of doors are centered in the opening.
Level the doors to each other.
- Look at the top of the doors where they meet in the middle of the door opening.
- Adjust the lower pivot by extending/retracting it to match both door height.
- Visually verify that the doors are centered in the opening and that they are parallel and level to each other.
Knobs and other hardware
Knobs are usually included in the installation kit. Installing the knobs for the doors will require measuring the door in two different directions to get the location of the knob. You may be installing a knob that uses a threaded bolt or you may have a knob that uses a screw. In either case, you will still need to measure to locate the knob so that they match from one door to the other. Also, the only difference in the hole size will be that a threaded knob will require a thru-hole sized just a little larger than the threaded bolt. A screw-type knob will need a pilot hole(see chart below) a little smaller than the screw.
In either case your finished product is going to need to be rip-out and split free.
When you drill the hole in the door which door do you drill? The bifold door closest to the center of the door opening on each side is your door. Where the hole location is up to you but I placed mine centered on the door panel in the width dimension and in the height dimensions of the panel.
I use blue masking tape on both sides of the panel to help prevent rip-outs while drilling the hole. Using tape also keeps the marks for the hole location are on the tape and will get removed along with the tape when the holes have been drilled.
If you want to know more about drilling a pilot hole this is a good short video.
Pilot hole drill bit size chart
| Screw Size | Pilot hole size for hardwoods | Pilot hole size for softwood |
| #1 | 3/64 | 1/32 |
| #2 | 3/64 | 3/32 |
| #3 | 1/16 | 3/64 |
| #4 | 1/16 | 3/64 |
| #5 | 5/64 | 1/16 |
| #6 | 3/32 | 5/64 |
| #7 | 3/32 | 5/64 |
| #8 | 1/8 | 3/32 |
| #9 | 1/8 | 3/32 |
| #10 | 1/8 | 7/64 |
| #11 | 5/32 | 9/64 |
| #12 | 9/64 | 1/8 |
Bi-Fold Door Surface Aligners
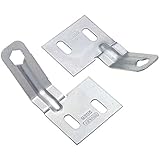
![]() Install the surface aligners only after having leveled the doors to each other. The best way to get the surface aligners level to each other is to install the aligner that will have the extended piece on top first.
Install the surface aligners only after having leveled the doors to each other. The best way to get the surface aligners level to each other is to install the aligner that will have the extended piece on top first.
Place a torpedo level on the upper surface of the aligner(see installation drawing below) and level it approximately 5-6″ from the bottom of the door. Match the bracket edge with the door edge. Mark the screw location at the center of the slots. Pre-drill and install the screws and the aligner bracket.
For the other door bracket place the torpedo level on the bottom edge of the installed bracket. Place the other bracket on the torpedo level and match the door and bracket edges. Mark the screw location at the center of the slots. Predrill the screw slots and install the second bracket and screws.
 Aligner bracket installation screw location
That’s it your done. The doors are up and fully functional. There are no more steps needed except to step back and admire your handy work.
Related Article: Bifold Door Mod
(Mybusyretiredlife.com All Rights Reserved)
Liked This Post? You May Like These:
