Unclogging A Shower Head
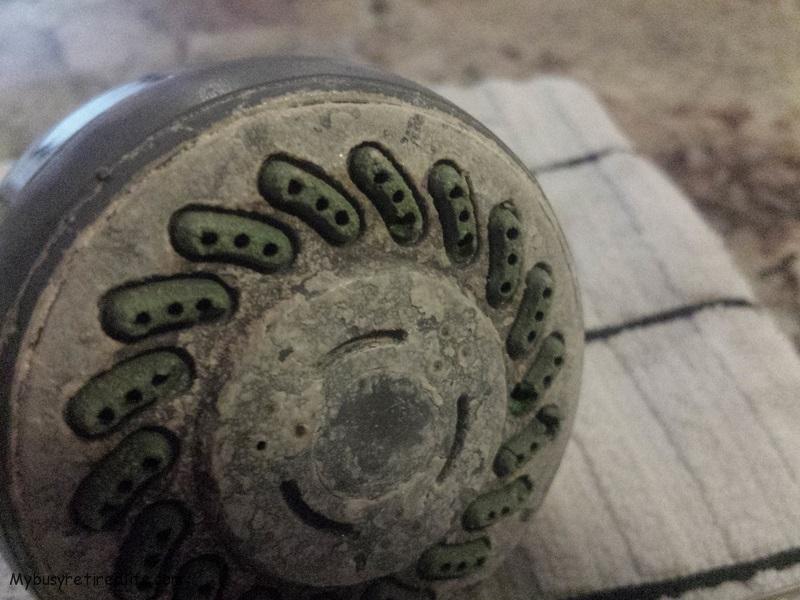 Shower head needing cleaning
Unclogging a shower head is super easy. Mineral deposits build up on water fixtures, and sooner or later faucets and shower heads will become coated with these minerals. I hadn’t cleaned my shower head in a very long time and it was time for a good cleaning. The mineral scale had almost covered all the holes. But luckily unclogging a shower head is easy, but the process can take an hour for a quick clean or it can last as long as overnight if soaking for a more thorough clean.
Related: Flushing The Tankless Water Heater
Two reasons
There are two reasons why the shower head can be clogged. Mineral deposits build up in the holes of the shower head and here in the central valley of California fine sand particles(water pumped from the ground) and rust flakes(from the pipes) can also clog these same holes.
I like to remove the shower head from the shower arm. This way I can reverse the water flow thru the shower head to aid in the removal of any loose particles. I also break up any build up(with the needle) before immersing the shower head in a mineral dissolving solution(white vinegar) to speed up the process.
What you will need
- Adjustable wrench
- Tongue and Groove Pliers
- Rag(to protect the shower arm)
- Baggy quart size
- Large cup or container to hold the vinegar/shower head full baggy for 8 hours or more.
- Large sewing needle
- Stiff bristle brush
- Teflon tape
- White vinegar
Remove it
In my case getting the shower head off the shower arm requires an adjustable wrench. There are two small flat areas on the shower head(near the shower arm) that you can place the wrench on to remove the shower head. I used the tongue and groove pliers to keep the shower arm from turning. A rag placed over the shower arm protected it from being scratched by the pliers as the shower head was loosened.
Open up the holes
I like to speed up the scale removing process by opening up the shower head’s holes. The large needle is the right tool for this job. It has a sharp point that makes it easier to punch through the scale/mineral build up. This will allow the vinegar to get these areas clean quicker.
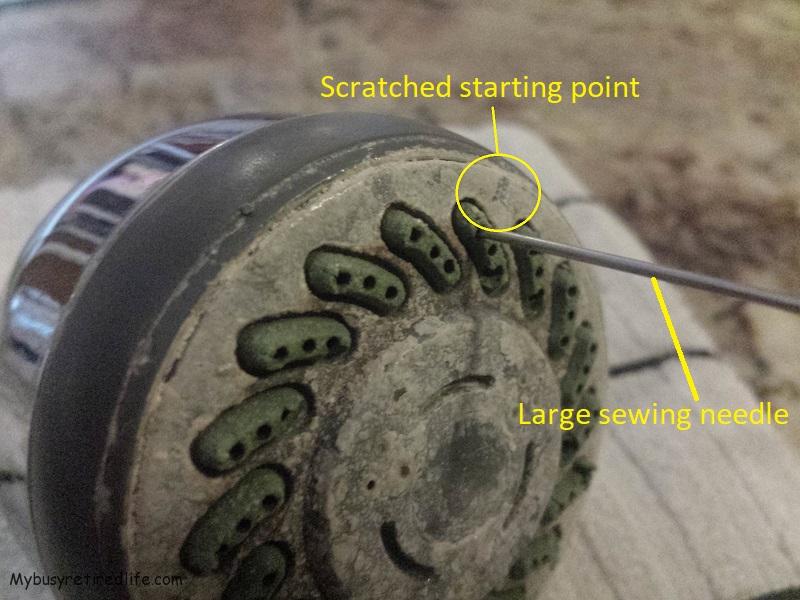 Starting point with large needle in shower head
Create a starting point
I mark the place on the shower head where I will start pushing the needle into the holes and work my way around the shower head holes until I am back at the starting place. Then I place the shower head in a quart baggy and completely fill the baggy with vinegar until the entire shower head is covered.
 Shower head soaking in vinegar
Soak it
If you see a large buildup of limescale on your shower head(like mine) you may want to soak it to remove it. The cleaning/soaking process will take between eight to twelve hours for a really limescaled shower head like mine. So plan on performing limescale removal when the shower isn’t needed. Most of the limescale will dissolve when soaked in vinegar. But there could be residue left over that will need a stiff bristle brush or more time in the vinegar.
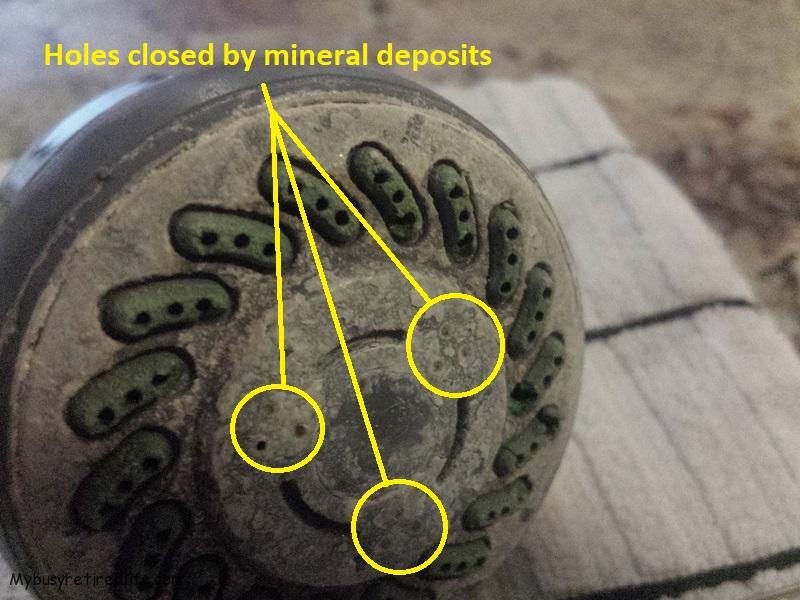
Shower head with mineral deposits
How to handle the tough stuff
Do not use a wire brush as it can scratch the shower head surface.
Put it in reverse
After it has been descaled I like to run water thru the shower head in the reverse direction. This helps in removing any loose particles(usually rusty pieces) larger than the shower head holes within the shower head. I do this by placing the shower head holes up against a slow running faucet. Then I tap the shower head against a hard surface(usually my countertop with a rag on it) to help dislodge these rust pieces. I repeat the process until there are no longer any pieces coming out of the shower head.
How do I know that any loose rusty pieces are coming out of the shower head? I plug up the sink and as I reverse the water thru the shower holes any pieces are caught in the sink.
Installation
Apply Teflon tape to the pipe threads before installing the shower head. Turn the water on and inspect for any leaks. You may want to plan on making this a yearly chore to make it easier to clean the next time. If you can’t remove a plumbing fixture(like a faucet) to place it in vinegar, soak a cloth in white vinegar and wrap it around the area you want to clean.
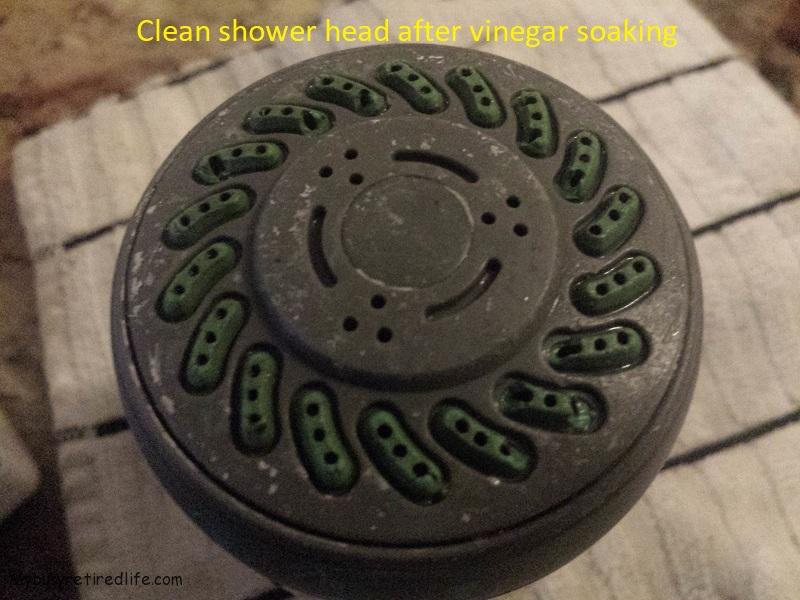 Clean shower head
My shower head
The pictures in this article are of my actual shower head. The shower head is about 20 years old and after many cleanings is still working perfectly. The holes where parts of the rubber are missing is because the material is no longer soft(rubber-like) due to its age. The cleaning process took twelve hours of soaking to get most of the mineral deposits loose.
Related Article: Cleaning a faucet aerator
(Mybusyretiredlife.com All Rights Reserved)
(Mybusyretiredlife.com All Rights Reserved)
(Mybusyretiredlife.com All Rights Reserved)
(Mybusyretiredlife.com All Rights Reserved)
(Mybusyretiredlife.com All Rights Reserved)
(Mybusyretiredlife.com All Rights Reserved)
Liked This Post? You May Like These:
