Troubleshooting the offline automatic chlorinator
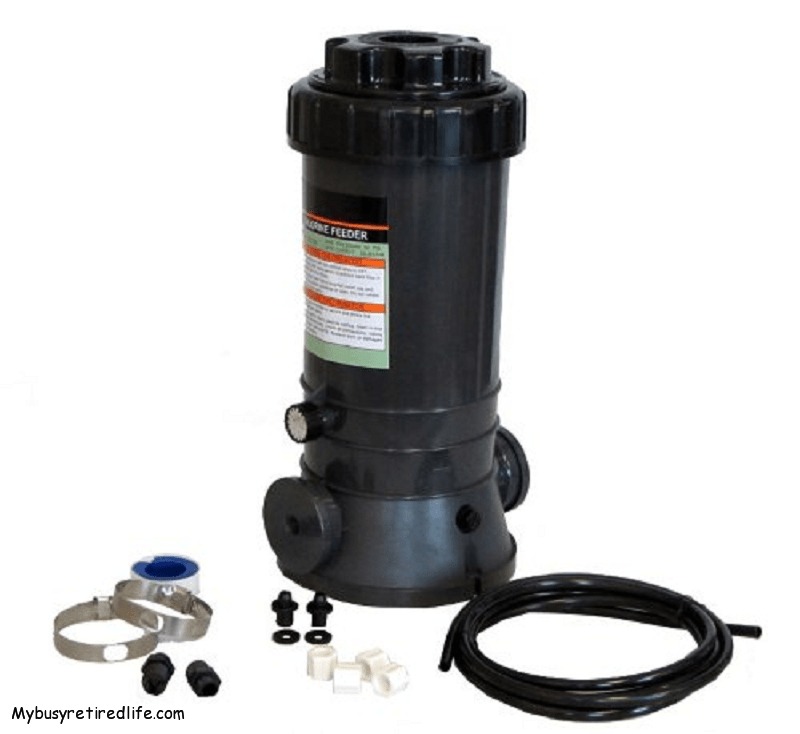
Offline Chlorinator at Amazon.com
Other than leaks, troubleshooting the offline automatic chlorinator is a matter of checking water flow. That means that in this system there are four points where water flow can become restricted. Problems will always be a lack of flow.
Plugged up supply line
The main problem with this type of chlorinator is that it can plug up. Water fed to the chlorinator has not been filtered. So anything that can show up in your pool filter can show up in your chlorinator. There is no screen or prefilter that will filter out the clogging matter before it is in the chlorinator. So if your chlorinator is suddenly not performing as well as it should, look for clogging type matter.
How it works, if you wanted to know
This chlorinator works on a pressure difference between the water going into the filter(most pressure) and the water coming out of the filter(slightly less pressure due to the resistance of the filter media). It is this pressure difference that makes it work. Without this pressure difference, the water would not move through the chlorinator, it would simply not have the push needed to move water across the chlorine tablets.
A word on parts condition
These plastic parts you will be working with are exposed to chlorine. Chlorine is highly corrosive. Before you try to take anything apart you may want to have a few spare parts on hand. These parts are only found at pool stores or online. So if you’re working on this system you need spare parts on hand or an open pool store in case a part needs replacement.
![]()
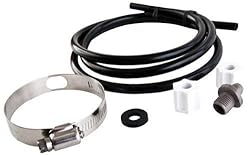
Chlorinator Parts Kits at Amazon.com
Safety first
![]() Before working on the chlorinator
Before working on the chlorinator
- Make sure your pump is off.
- Unplug or throw the circuit breaker to the pump.
- Verify that the timer can not turn on the pump.
- Before you remove the cover from the chlorinator beware that chlorine gas has accumulated in the chlorinator and will be released. Make sure that you have plenty of ventilation. You may want to leave the area until it has dissipated.
Elemental chlorine at high concentrations is extremely dangerous and poisonous for all living organisms, and was used in World War I as the first gaseous chemical warfare agent.
From Wikipedia, the free encyclopedia(Redirected from Chlorine gas) https://en.wikipedia.org/wiki/Chlorine
The First thing to check
If you have removed the chlorinator for cleaning and it is not working properly check that the chlorinator is installed correctly. That means that you need to verify that the arrows indicating flow molded into the body of the chlorinator are attached to the correct supply and discharge water lines. If you don’t have installation instructions this set of instructions will work for any offline chlorinator.
Testing the Infeed water
The first place to look is the infeed water line to the chlorinator. This is the easiest test as it is visual. With the pump off open the chlorinator. Make sure to allow the chlorinator gas to vacate the area and the chlorinator canister to drop its water level before continuing. Remove the drain plug if necessary to lower the water level.
Verify that the flow control valve is at full or that it is fully open before continuing. So with the water level in the canister at a low level turn on the pump and observe the rise of the water level in the canister. It should rise rather quickly if there are no restrictions. If the water does not rise or rises very slowly you have a problem somewhere in the line to the offline chlorinator or the chlorinator flow control valve is in need of cleaning.
You can check the water lines using a dry method. If you have an air compressor, a duster can, or a shop vacuum that you can connect the vacuum hose on the exhaust side, blow out both the infeed and return lines. Verify that the air is moving freely thru the lines. If you don’t have one of the above.
Wet it is!
Remove the infeed water line at the chlorinator. Restrict its movement by holding it or placing weight on it. Aim it away from you and anyone else in the area. Have someone turn on the pump while you verify that the water is moving freely. If the water line is clear move on to the chlorinator.
Remove the chlorine tablets from the chlorinator. Remove the return side water line from the chlorinator.
At the chlorinator remove the screw that holds the flow control valve adjustment knob. Remove the flow control valve knob. Unscrew the flow control valve(check your manual if your chlorinator is different). Verify visually that the flow control valve is in one piece. Also when you look inside the place where it is mounted you can see the orifice where it will seat. I have had one such valve break off and half of the valve body stayed in the body of the Chlorinator. Blow out the tube from the flow control valve to the canister and infeed water line. Make sure all the paths are clear.
Return side checks
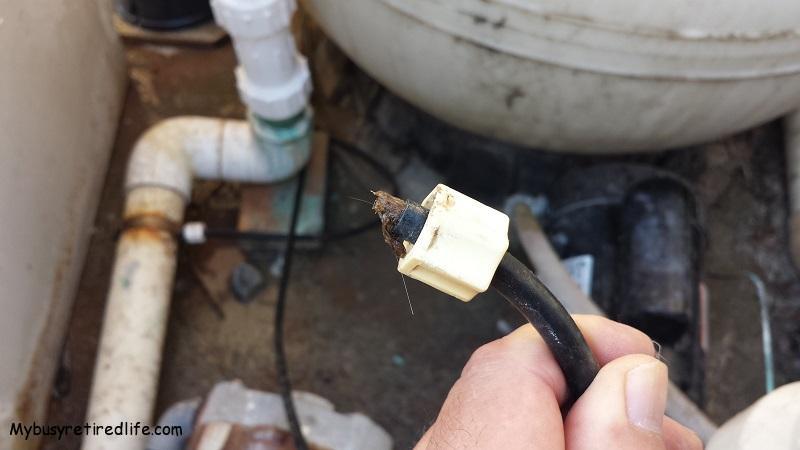
Before assembling the chlorinator inspect the check valve at the chlorinator return side. Before removing the check valve mark its location so that the check valve goes back into the correct side. You will need to remove the check valve from the chlorinator and while holding it close to your ear shake the valve back and forth. You should hear the ball in the check valve moving freely. If it does not move freely(you don’t hear anything) you will need to clear the check valve of debris.
To clear the check valve use a small pick like device and be gentle with the ball as you pick the debris to remove it. You do not want to damage the check valve. I also used my air compressor with a blowgun. I blew both ends of the check valve in order to free up and remove the debris in my check valve. Shake the valve from time to time to check if the ball in the valve has become debris free.
Once the check valve is free reinstall Teflon tape on the threads and install on the chlorinator. Connect the infeed water line. Remove the return water line from the piping. Blow out the return water line. Verify that it is clear and reattach to the piping and chlorinator. Ok, the moment of truth, turn on the pump and verify that the chlorinator fills quickly. With the return line and the check valve free of debris, this chlorinator system is ready to start chlorinating the pool again.
Related Posts: Clear Sparkling Pool Water Strategy
My Pool Chlorinator
Offline Chlorinator Fitting Fails
(Mybusyretiredlife.com All Rights Reserved)
(Mybusyretiredlife.com All Rights Reserved)
(Mybusyretiredlife.com All Rights Reserved)
Liked This Post? You May Like These:

Thank you very much for the insight. I just got a new off line feeder and noticed it is performing well. I will go through your steps.
Hello Jon,
First welcome to the website and thank you for the comment. I hope you have trouble-free years from your offline feeder. One thing new I have started to use the following procedure every time I add tablets to the chlorinator. I add the chlorine tablets, then before replacing the lid, turn on the pump and verify that the water level rises in the chlorinator then shut the pool pump off and replace the lid. This verifies that I have good flow into the chlorinator before putting it back to work for the next week.
Good luck with your future endeavors,
RayC