How to Template for diagonal tile cuts
Diagonal Tile Mosaic
I learned how to make a template for diagonal tile cuts recently. I have tiled quite a few floors but for those floors, the tiles were always square to the room. Now for my latest tiling project, I was going to continue a previous tiling job(square again) to an addition we had built. I went to the tile manufacturer warehouse in our area and inquired if they may still have my tile. A stretch as this tile is over 20 years old. To my surprise, they still had the tile on the shelf. I grabbed a sample and took it home to check that the color still matched.
The color matched yea! But my joy was short-lived the color matched but the size was no longer the same. It seemed that somewhere along the line the manufacturer had downsized the size of the tile by a 1/8″ on both sides. My new tiles and my old tiles would no longer line up along grout lines. A big-big headache, what to do?
My final solution was to place a diamond pattern mosaic at the entryway to the addition. Then go back to a square pattern in the new room. With the mosaic pattern breaking the old and new tile grout lines. My hope is that it would make the grout lines appear to line up to the unaided eye.
A template to the rescue
Objects such as cabinets or walls that are not square require you to cut tile to fit up to or around them, creating a template ensures the cut tile is the right size and shape to fit the area without making multiple cuts, measuring or wasting time or materials. While my need for a template was for my mosaic this template technique will work for any diagonal type tile job whether its a mosaic or an entire room.
A template on a square tiling job is usually a full tile that you place against the wall or object that you are going to wrap tile around. You place and align a tile over a tile that has been stuck down then use your template to develop the scribe line for the wall or object on the tile.
Template length determined
Something different
This time I needed to learn how to develop a template for diagonal tile cuts. I knew how to use the template method for a square tile job. This diagonal tile job turned out to be very different.
My project was going to be a long rectangle of tile pieces on a diagonal, a mosaic if you will. I would assemble the mosaic then transfer it to the final position. There were no tiles already stuck down as a starting point.
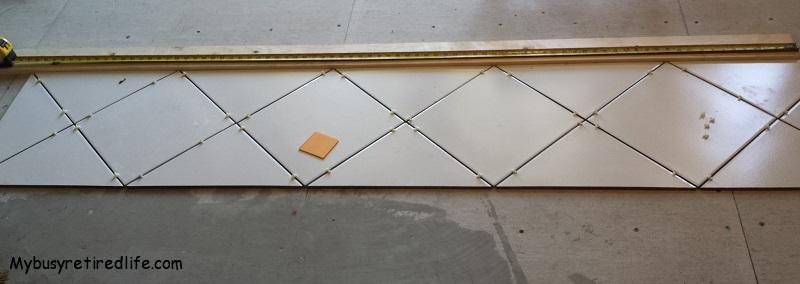
So I used a straight 1 by 4 screwed down to the floor to simulate the wall. I started by placing the whole tiles against that “wall” to get things started off in a straight line. Laying out the whole tiles and adding the cut pieces, then transfer the whole thing into position.
I start my search
I looked at Youtube.com for some inspiration. Most of the videos were about the use of a tool called a Measure Right Pro. While this seemed like a very nice tool to have(if you do a lot of tiling with different tile sizes), but I am a homeowner who would not have any use for it after this one project. I found the above video. It shows you how to make a one-time project template for diagonal tiles. The template is made up of simple materials. When the project is completed there is no need for storage, it will be discarded.
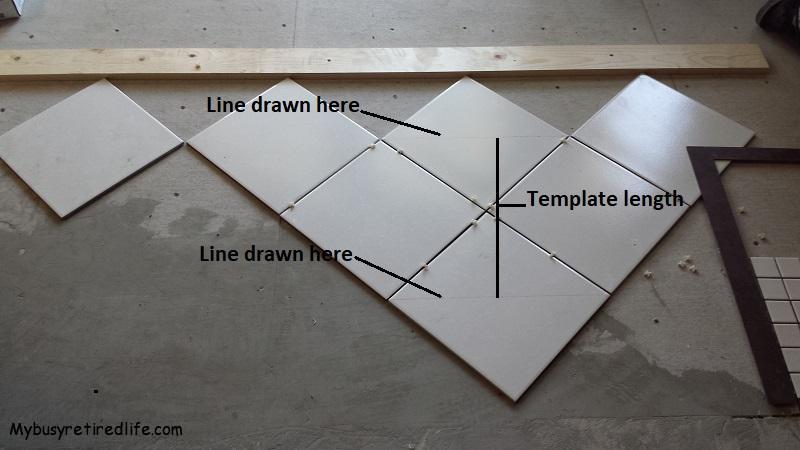
I followed the video and laid out my tiles with grout spacers to simulate tile that had been laid down. Then I divided two of the tiles in half marking the location with a pencil. My final dimension was 16 5/8″. Then I cut a piece of scrap material to the exact dimension. I now had my template.
How did it work out?
My cut pieces when fitted with grout spacers were butted up against the 1×4 “wall”. This means that if you use the dimensions as stated in the video the cut pieces could butt up against the object you have scribed against without a gap, as it happened to me(perfect for what I needed). If you’re unsure about the finished dimension I would suggest making a template according to the video’s instructions. Then check out if it’s what you need by cutting one tile piece and verifying its what you need.
If it’s not, and you wanted a gap at the scribed location, all it would cost you to make another template is time. Adjust as needed. Add the distance you would like to see from the tile to the “wall” to the measured distance of the two tiles for your new template. Cut your new template and scribe the tile you recently cut. The finished piece should be shorter the amount you added to the new template.
Related Articles: More flooring articles
(Mybusyretiredlife.com All Rights Reserved)
(Mybusyretiredlife.com All Rights Reserved)
(Mybusyretiredlife.com All Rights Reserved)
(Mybusyretiredlife.com All Rights Reserved)
Liked This Post? You May Like These:
