Toilet Replacement
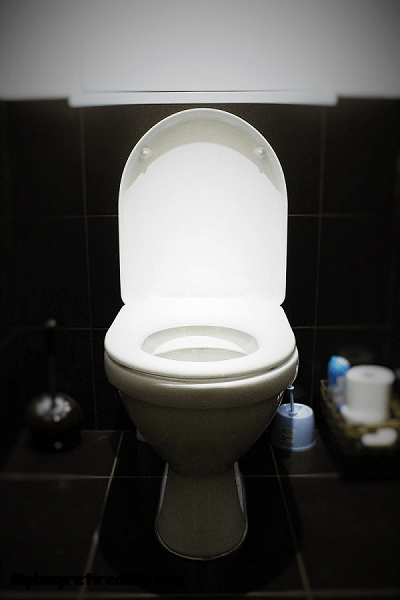
I had to replace a toilet this week. The tank cracked and just like that it was toilet replacement time.
First, you can not just buy a replacement tank. You have to buy a complete toilet. Replacing just the tank is a piece of cake. But you can not just buy a tank. This really bugs me. I have to replace the bowl section which is a lot more work than just the tank. Ok so much for my rant.
How To Remove A Toilet
Tools required
- Adjustable wrench
- Scraper
- Large screwdriver
- Saw for shortening the new toilet bowl mounting bolts
American Standard Champion Toilets – Amazon.com
Other things that are needed
- Towels or a large sponge similar to a car wash sponge
- Small bucket of water
- Cleaning liquid
- 3-4 plastic shopping bags
- Paper towels
- Replacing the toilet requires shutting off the water to the toilet. Locate the shut-off valve at the back of the toilet normally on the wall or coming thru the floor.
- Remove the tank lid and flush the toilet and continue to hold the flush handle down until all the water that can run out has run out.
- Use your towels or sponge to soak up any remaining water in the tank until it is without standing water.
- Place towels under the shut-off valve to catch any water. Remove the supply line from the tank. This might require only hands or it might require the use of the adjustable wrench to loosen the line for removal.
- Remove the nuts from the tank mounting bolts. They are located under the tank/bowl. It may be a hands only installation or it may require that you use your adjustable wrench.
- Carefully lift the tank off the bowl and discard properly.
Bowl Removal
- Use your small bucket of water to fill the bowl when it starts to move down stop filling. If you have done it properly the water level in the bowl will be much lower than normal.
- Use your scraper to remove the two caps from the mounting bolts. Place your scraper under the cap and pry up until the cap pops off the plastic disk.
- Use your adjustable wrench to remove the two nuts from the mounting bolts.
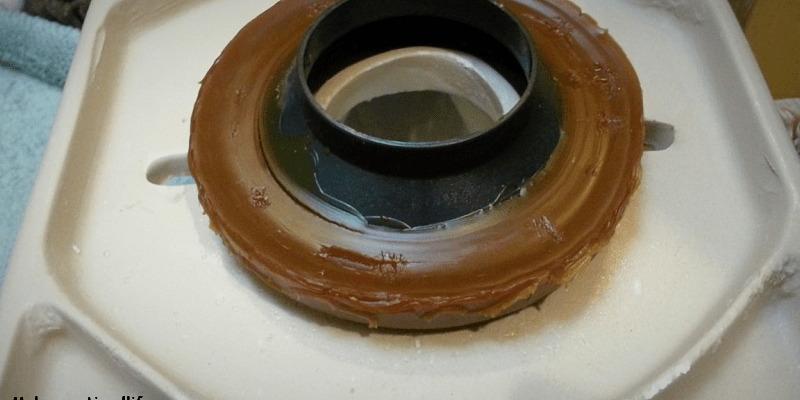
- Rock the bowl off the wax gasket. You may need to use your scraper to break the caulking seal between the bowl and the floor.
- Careful handling is required to move the bowl from the bathroom to the outside without spilling the remaining water. Remember there is a small amount of water left in the trap. Keep the tank end of the bowl slightly elevated as you move it.
Cleaning
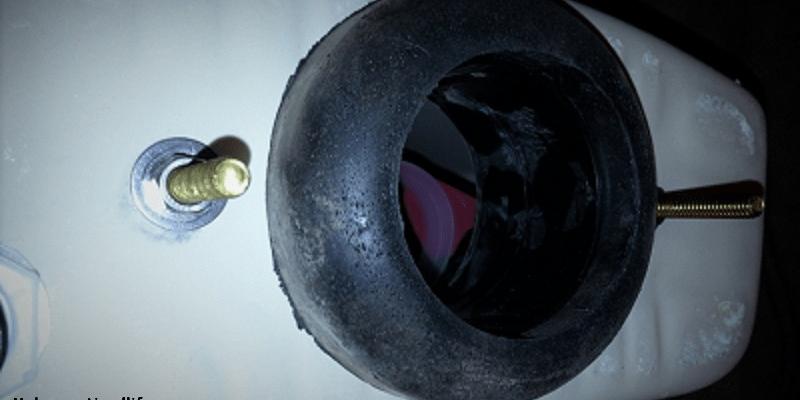
- Scrape the wax ring off the toilet flange. Remove all wax and crud from the toilet flange. Save some of the clean wax for later installation.
- Scrape off any caulking remaining on the floor.
- Use your cleaning liquid and paper towels to clean the floor area.
- Inspect the water shutoff valve and fill line conditions, if needed now is the time to replace them.

Before removing the valve make sure that the water to the house is shut off and that the valve can be removed. Look for pipe threads where the valve is connected to the pipe. If it is a copper pipe connection it may be sweated in place. If it is sweated in place you will need to replace the internal washers of the valve rather than the whole valve or have a plumber replace the valve for you.

American Standard Champion Slow Close Toilet Seats – Amazon.com
Ok so what you should have now is:
- The water is shut off
- The toilet has been removed
- Area completely cleaned up
- The fill valve and fill line have been inspected and are in good condition or have been replaced.
What To Know Before You Buy
You are now ready to put in the new toilet. There are some things you will need to know before you go shopping for a new toilet. These things will ensure that your installation is trouble-free. Before you remove the toilet, first measure from the wall behind the toilet to the center of the bolts at the base of the toilet. For a standard toilet, the measurement should be between 11” and 13”. Next, determine whether your toilet is an elongated or round bowl type. The round bowl toilets are better suited to small bathrooms where space is at a premium. Elongated bowl toilets are more comfortable but require more space. And last the height of the toilet as measured top of the bowl section to the floor.
You will need the following
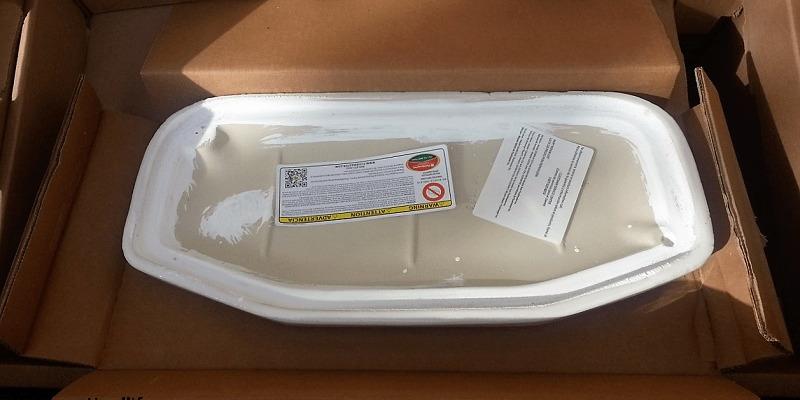
- A toilet tank and bowl (before purchasing the parts below check which parts come with your new toilet)
- A new toilet seat
- A new fill line (if needed)
- A tank to bowl kit
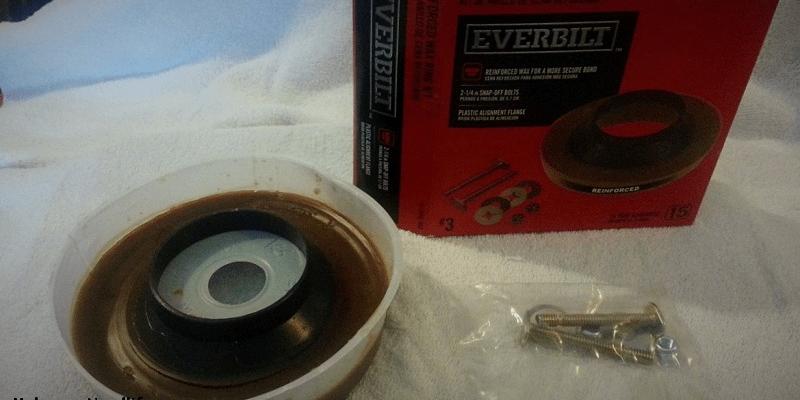
- A new wax gasket with plastic alignment flange
- Toilet mounting snap off bolts(2) kit
- Toilet bolt caps
How To Install A Toilet
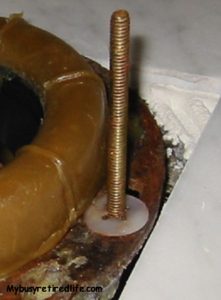
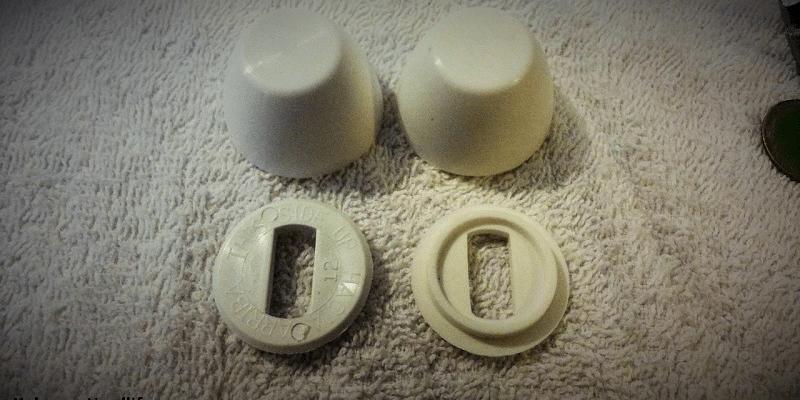
Plastic Retainer Washer
- Put the new bolts into the flange slots and using the “old” clean wax pack it around the bolts to hold them in place. If your hardware kit has plastic washers with the inside diameter fluted like the photo to the right these are retaining washers and you do not need to use the old wax method.
- With the bowl upside down align the wax gasket on the bowl and gently push so that it sticks to the bowl so that when you turn it over to place on the floor flange it stays put.
- Right the bowl and align the bolts and the wax gasket flange so that it is centered on the floor flange.
- Visually look at the bowl and make sure it is square to the back wall and not at an angle.
- Push down on the bowl and carefully sit on the bowl to seat the gasket and ensure a watertight connection(do not rock the bowl as this may prevent the watertight seal from occurring).
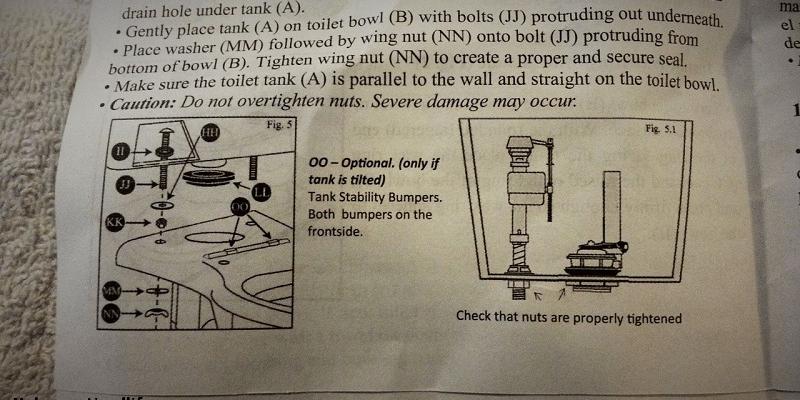
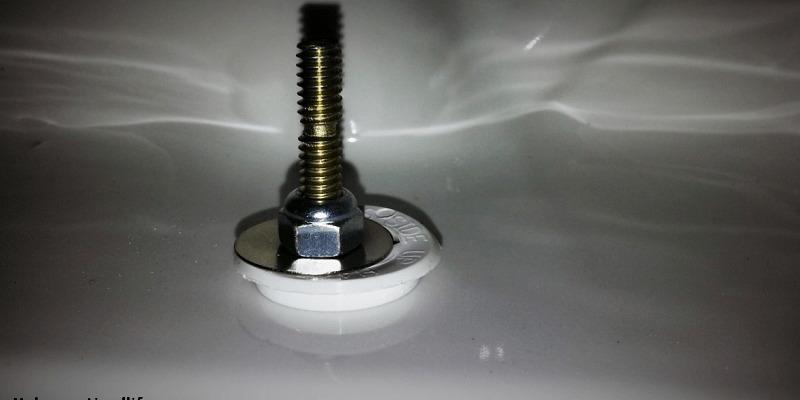
- Install the bowl plastic disk part with the brass and plastic washers and locking nuts on both sides and tighten evenly. Caution do not overtighten, you can crack the porcelain. There should be no movement of the bowl when you are finished.
- Cut off the bolts so the cap will install correctly.
- Snap the bolt caps into place.
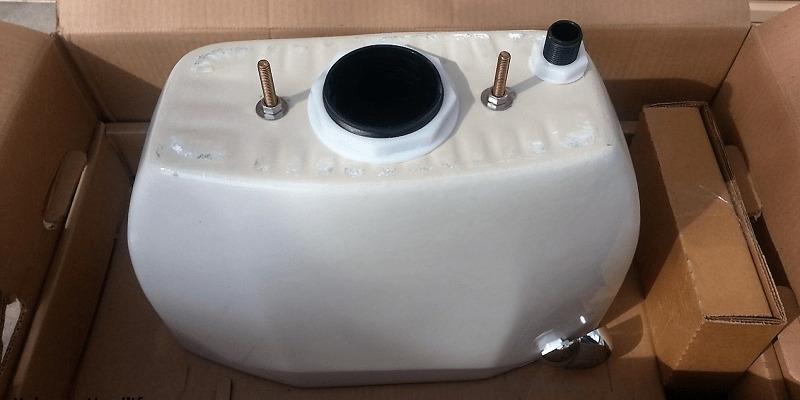
- Assemble the tank making sure the gasket, the bolts, sealing washers, brass washers, and nuts are installed as per your tank to bowl kit instructions. Click here for a good video of this installation.
 with the brass and plastic washers and locking nuts on both sides and tighten evenly. Caution do not overtighten, you can crack the porcelain. There should be no movement of the bowl when you are finished.
Tip
- I like the type of kits where the bolts are held tight against the tank by an additional nut and washer on the bottom of the tank. This type of kit squeezes the rubber washer against the tank bottom giving you a good waterproof seal before installing the tank on the bowl.
- Align the tank bolts to the holes in the bowl. Put the washers and nuts on the bolts and tighten evenly from side to side until the tank will no longer move.
- Attach the fill line to the tank fill valve.
- Attach the toilet seat using the manufacturer’s instruction sheets.
- Turn on the water at the shut-off valve and check for leaks at both ends of the fill line. Flush the toilet 3-4 times, check for water leaks at the tank to bowl gasket area. Check that there are no water leaks from under the bowl.
- If no leaks are found install a bead of caulking between the bowl and the floor.

How long does it take to Replace a toilet?
Providing that no bolts become stubborn to remove, estimate it at 2 hours to remove and clean up the area. That’s way more than enough time. Double the removal time for installation. At this rate, it will be a very easy day with no need to rush for anything.
Related Article: Pumice Stone and Hard Water Buildup on Toilets
(Mybusyretiredlife.com All rights reserved)
(Mybusyretiredlife.com All Rights Reserved)
Liked This Post? You May Like These:
