Shop for sprinkler-valves-with-anti-siphon at Amazon.com
Sprinkler valve leaking
My sprinkler valve leaking is giving me headaches. Everything has been good for years and years now things are not working like they should. The lowest sprinkler on one of the lines is leaking water all the time. One other valve is leaking at the anti-siphon valve when the water is on and running toward the sprinklers. Another sprinkler valve for my drip system is not shutting off. I can “hear” the water running all the time. What is in common with all these problems is the valves. All of the problems are valve related. Since we just had a good drenching rain recently I shut off the water to these valves and turned off my sprinkler controller until I can get to them.
When I installed these valves I planned for the day that they would eventually need to be replaced. I included unions for the valve so that they can easily be replaced without having to cut the lines for valve replacement. But I don’t believe that I will need to replace all the valves. The first thing to do was to take apart the valves and see what is causing the problems.
How valves work is very simple
If you know how something is supposed to work you will know what is wrong when it doesn’t work.
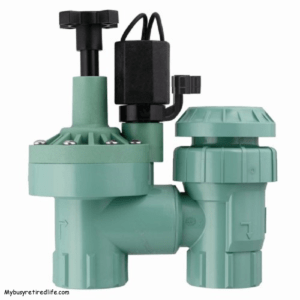
Parts of the valve
- Solenoid with a plunger for electrical operation of the valve
- Flow control handle regulates the maximum flow of water thru the valve
- Manual bleeder screw for manual operation of the valve
- The main body(the part with all the ports and seats)
- Valve bonnet with spring
- Diaphragm
Normal state(valve closed water not going anywhere)
- The solenoid is connected to the controller no power is present at the solenoid.
- The solenoid plunger aided by a very weak spring is seated on the small port blocking water from leaving the valve bonnet side.
- The valve bonnet chamber is full of water and is pressing the diaphragm down onto the diaphragm seat.
- Water(from the city/pump) is under the diaphragm pushing upwards but unable to open the diaphragm due to the pressure from the surface area differential.
Watering state(valve open water going to the sprinklers)
- The solenoid is connected to the controller, power is present at the solenoid.
- The solenoid has created an electromagnet(see video below) and pulled the plunger off the seat of the small port, water is leaving the valve bonnet side.
- The valve bonnet chamber is being emptied of water and is no longer capable of pressing the diaphragm down onto the diaphragm seat.
- The diaphragm has lifted off its seat.
- Water(from the city/pump) under the diaphragm has pushed upwards against the diaphragm lifting it off its seat.
- Water is going to the sprinklers
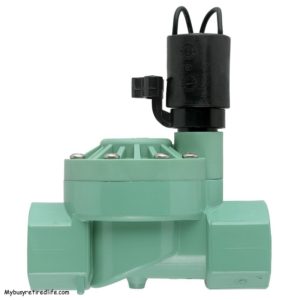
Shop for inline- sprinkler valves at Amazon.com
The normal state is that the diaphragm blocks the water when the pressure is greater on the top side. So for the very small leaks(water leaking from the sprinkler) , think the problem is in the solenoid area. Either the solenoid is not seating properly on the small port or there is a little debris between the port and the solenoid plunger. This is creating a tiny leak(the water leaking at the sprinkler) but not large enough to cause the valve to open.
The Problems
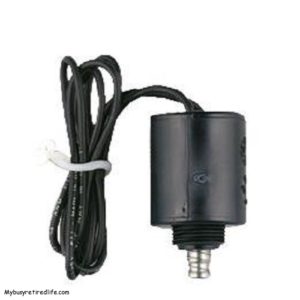
Shop for Replacement solenoids at Amazon.com
After removing the solenoid from the sprinkler valve I found the problem. The solenoid plunger walls had a buildup that would not let it move freely. It would stick/bind from the buildup on the plunger wall. I pulled out my trusty pocket knife and started to gently scrape the buildup off the plunger. Scraping the buildup off and getting to bare metal was my goal. I checked the movement and it was greatly improved. I also gently stretched the light spring attached to the plunger and reinstalled it. A quick check for leaks and there were none. One down two more to go.
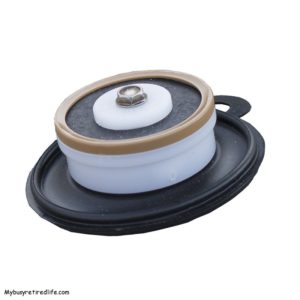
Shop for replacement diaphragms at Amazon.com
The second leaker turned out to be a small piece of debris on the small valve seat under the solenoid plunger. My fingernail made quick work of removing it from the seat. I reinstalled the solenoid and a quick check later everything was back to normal. Two down one to go.
Valve Seat
The valve seat is a internal surface against which a valve rests during the portion of the operating cycle when that valve is closed.
This last valve was leaking at the anti-siphon valve. This one was going to be different. I removed the top of the anti-siphon valve and immediately found that the seal for the valve had a break in it. I was going to have to replace this valve as I didn’t have a spare old valve around to cannibalize. So that was it. Two repairs and one replacement and my system is back in tip-top shape.
Related Articles: Drip Irrigation
Related Articles: All Things PVC
