A DIY Simple Honing Tool
A DIY simple honing tool is something you may need from time to time. In my case, this time, I needed to enlarge a weed eater replacement part. This article will show you how to make this simple tool with materials that you may already have on hand.
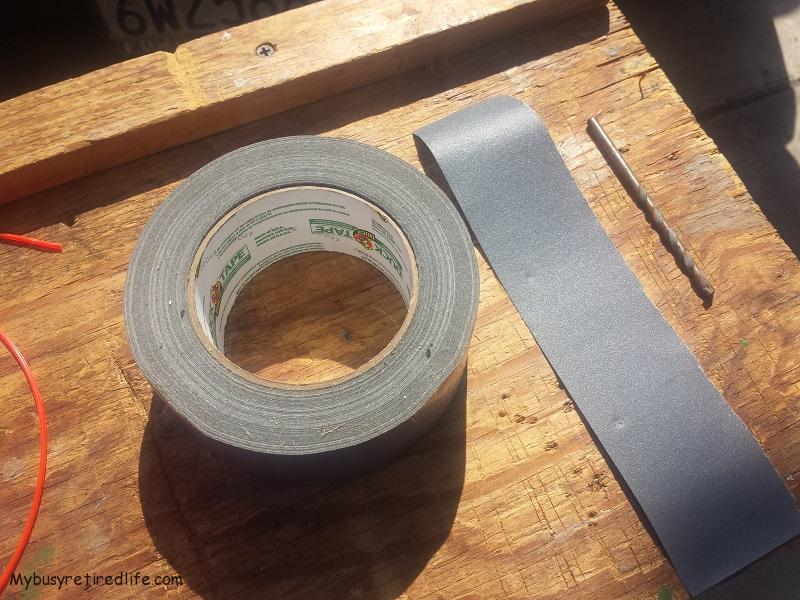 DIY simple honing tool materials
What it will do
Honing is usually done on metal cylinders. But it can also be used on other materials if needed. In a honing process, a rotating tool uses abrasives to remove material from the interior surface of a bore or cylinder. A honing tool is meant to remove/smooth over small scratches. It is not meant to remove large amounts of material.
The three pieces
How to make a hone is very simple. You will need three pieces to make a DIY simple honing tool.
- Duct tape(you can substitute masking tape but duct tape is preferred)
- A drill bit sized for the hole you’re working with(small hole very small drill bit/larger hole larger drill bit)
- Sandpaper or Emery cloth(wet/dry preferred) grit size is determined by how fast you want the material removed. But for first-time users, use a finer grit for better control of the process.
Cut a short piece of duct tape, enough to wrap the drill bit and have a small section of tape on both sides of the sandpaper/emery cloth. Cut a strip of sandpaper/emery cloth so that its width extends from the end of the drill bit to cover most of the drill bit.
Assemble The DIY Simple Honing Tool
- Combine the duct tape and the sandpaper/emery cloth so that half the tape is on the grit side.
- With the grit side down and the adhesive side up on the left side place the drill bit on the duct tape(see photo below).
- Wrap the duct tape over the drill bit and press onto the backside of the sandpaper.
- Roll the sandpaper/emery cloth counterclockwise over the drill bit so that the drill bit is covered by several wraps of sandpaper.
- Check if the wrapped drill bit will fit into the cylinder/hole that needs honing.
- If it won’t fit due to many wraps of sandpaper. Remove a wrap of sandpaper/emery cloth and check again. Repeat the procedure until it will fit in the cylinder/hole.
- When it fits attach the drill bit to your drill.


How to use the DIY simple honing tool
Have the part that needs honing securely held and start your drill with the hone in the cylinder/hole. Always keep the hone moving within the cylinder. Move the hone up and down and move it so it contacts the side of the hole as parallel as possible while spinning. Move the bit so it contacts the entire circumference of the hole. Check the hole for fit and if necessary remove the last 1/4″ of the sandpaper/emery cloth as it gets worn or clogged to give the hone a new abrasive surface.
(Mybusyretiredlife.com All Rights Reserved)
(Mybusyretiredlife.com All Rights Reserved)
(Mybusyretiredlife.com All Rights Reserved)
(Mybusyretiredlife.com All Rights Reserved)
(Mybusyretiredlife.com All Rights Reserved)
(Mybusyretiredlife.com All Rights Reserved)
Liked This Post? You May Like These:
