Kreepy Krauly swivel bearing replacement
Worn Out Swivel Bearing
The Kreepy Krauly swivel bearing replacement is one job where I could not find a video of the replacement procedure. I could not find more than the generic statement of “change out the bearing”. I had to develop this procedure. It can be handled in two ways. The first method is to use tools to pry it off the swivel head assembly. The next method is to pry it off the swivel head assembly with no tools used.
When you’re working with the swivel cone you have to remember that it is plastic in an environment of chlorine. The plastic can become brittle over time. Using tools on this part to pry it out of its place can result in breakage of the swivel and or the swivel head assembly.
Why hands on?

Kreepy Krauly bearing at Amazon.com
![]()
This is the method I choose. Since I hadn’t found a video on how to replace the swivel cone-bearing I needed to develop a method to show how to do it. Considering that the parts are not pristine is a big reason why I choose this method.
It’s taken awhile to wear out the bearing. They have age and or a deteriorated state due to chlorine exposure. Tools pushing on the parts could cause breakage. Not good if you want to reuse the parts. Also if I used tools I couldn’t count on anyone having a set of plastic pry bars to use. So a tool-less method would be almost universal. The only tools required would be to use your hands to remove and replace the swivel cone.![]()
Care must be taken, the swivel cone is extremely difficult to remove using your hands. I did opt to use a lubricant to aid in installing the swivel cone onto the swivel head assembly. Silicone spray is the lubricant I choose. It is a dry spray and will not create an oil slick condition in your pool.
Removing the bearing and swivel cone
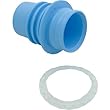
Swivel Cone and Bearing at Amazon.com
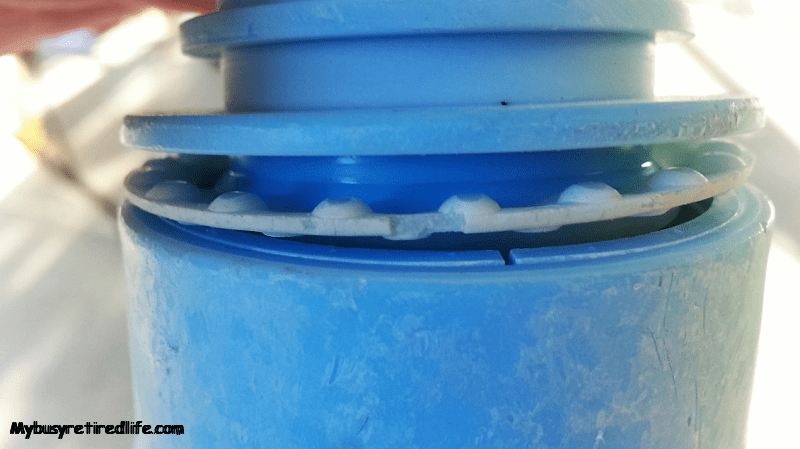
![]() To remove the swivel cone first pull up on the swivel cone. Then use both your thumbs to press on the swivel cone as far from the swivel cone assembly as possible to provide the most leverage. It does take some strength to pop it out of place but it will move.
To remove the swivel cone first pull up on the swivel cone. Then use both your thumbs to press on the swivel cone as far from the swivel cone assembly as possible to provide the most leverage. It does take some strength to pop it out of place but it will move.
Installing the new bearing
Putting it back into place will take the most effort.
- Spray the swivel cone and the swivel cone assembly with silicone spray.
- Install the bearing on the swivel cone. Make sure it is on correctly.
- Place the swivel cone at an angle into the swivel cone assembly.
- Push down and attempt to walk the cone back into position. Keep trying until it pops into place.
Related Article: My Kreepy Krauly Inspection and Rebuild
(Mybusyretiredlife.com All Rights Reserved)
Liked This Post? You May Like These:

good article, gave me the confidence to exert full force to get things in place. Thanks
You are most welcome. I am glad to hear that this article helped you.
You were right, no one else tells or shows how to do this so THANK YOU so much, it helped immensely!
Hello Selena,
Thank you for your comment. I’m glad that this short article and video could help in your endeavors.
RayC